Native Integration Guide
This document provides a step by step guide on how to install, integrate and initialize the BlockID SDK into any Android applications.
Prerequisites
Integrating the BlockID SDK into an Android application requires several general and platform-specific dependencies. Developers should review the following requirements:
General
- A basic understanding of Android application development
- At least one compatible Android mobile device
Technical
- Android API Level: 28 / Android OS 9 or higher
- Android Studio Panda 2 | 2025.3.2 or higher
- Android Gradle Plugin: Version 9.0.0 or higher
- Device Support: All devices running Android 9.0 or higher
The BlockID SDK currently supports Android OS versions up to 16.x.
Integration Overview
This section explains the step by step guide on how to setup and integrate the BlockID SDK in an Android application.
The examples below demonstrate how to integrate the BlockID SDK into a new Android project. The same steps apply when integrating the SDK into an existing application.
The screenshots in this section were taken using Android Studio Panda 2 on Mac.
Step 1: Create a New Application
-
Open Android Studio.
-
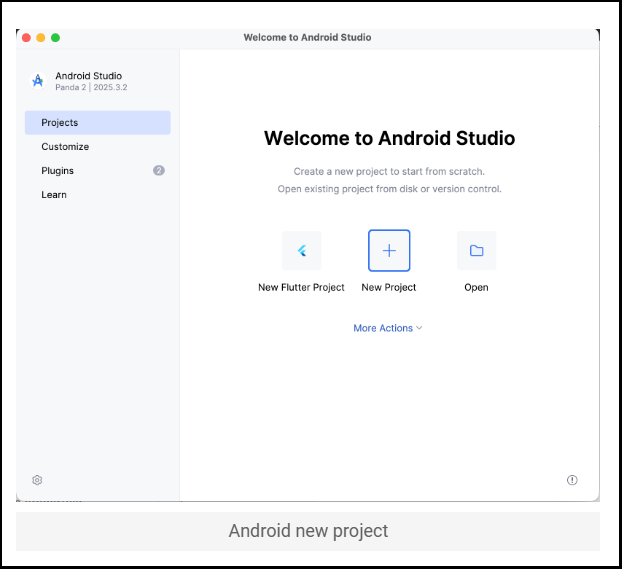
In the Welcome Screen, click New Project.
-
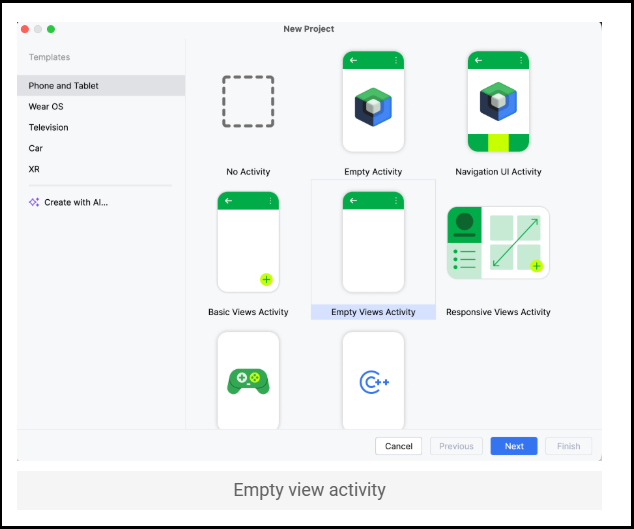
In the New Project screen, select the required project template and press Next. In this example, an Empty Activity project template is selected.
-
In the New Project window that is displayed, specify the following details. You can use the sample screenshot below to specify the field details.
Field Description Name Specify an application name. Example: BlockID Demo Package name Specify a package to which the application belongs. Save location Specify the location where you want to save the project. language Specify the project language. This is an optional field. Minimum SDK Specify the minimum supported SDK version. Use API 28 (Android 9.0 "Oreo"), as the BlockID SDK supports API 28 onwards. 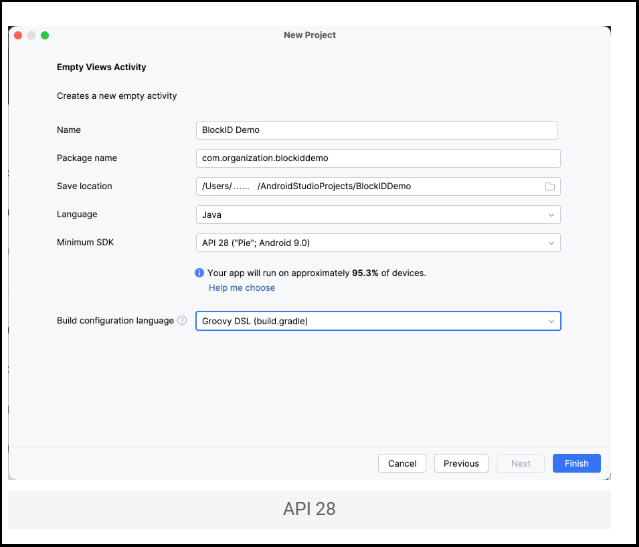
-
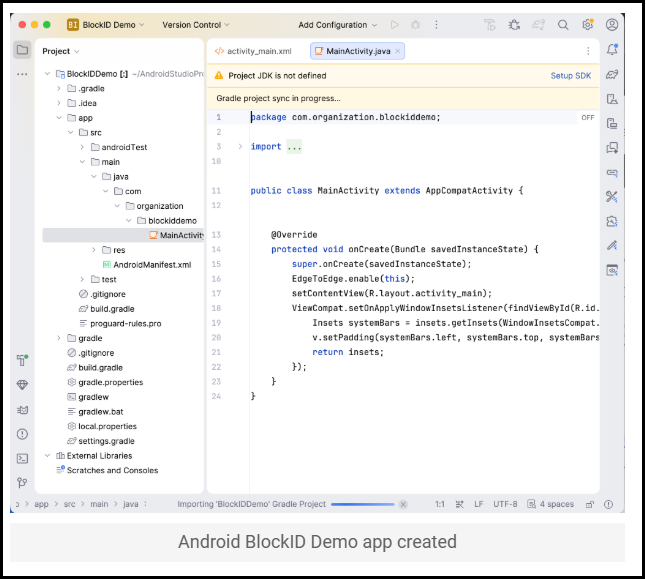
Click Finish and wait until the project is being configured completely.
Step 2: Add BlockID SDK
Once the project is created, the next step is to integrate the BlockID SDK. The latest version of the BlockID SDK can be added using a Gradle dependency.
- Open your Android Studio project and navigate to the app-level build.gradle file. Add the following line to the dependencies block.
// Add BlockIDSDK dependency
implementation 'com.onekosmos.blockid.sdk:blockidsdk:1.30.60.6A980573'
- Open your
settings.gradlefile and add the following block.
Starting with Release v1.30.50, the SDK artifact repository has migrated from https://nexus-1k-nonprod.1kosmos.net/repository/maven-releases/ to https://artifactory.1kosmos.net/artifactory/maven-releases-local/.
Update your settings.gradle accordingly.
dependencyResolutionManagement {
    repositoriesMode.set(RepositoriesMode.FAIL_ON_PROJECT_REPOS)
    repositories {
        google()
        mavenCentral()
        maven {
            url 'https://artifactory.1kosmos.net/artifactory/maven-releases-local'
            credentials {
                username = 'developer'
                password = 'xK9#mPw2$vLq7nBz!'
            }
        }
        maven { url "https://jitpack.io" }
    }
}
Step 3: Java Compatibility
The SDK is not binary compatible with applications that target Java 11. In order to use this and future releases, you must upgrade applications to target Java 17. Refer following code snippet for reference.
Below is a snippet for reference:
android {
  compileOptions {
    sourceCompatibility JavaVersion.VERSION_17
        targetCompatibility JavaVersion.VERSION_17
    }
}
Step 4: Update Android Manifest
BlockID SDK provides scanning features for various documents for which the application must enable and ask for camera permission. As the BlockID SDK support is from Android API 28, you will need to ensure that application is set to request runtime permissions for camera (and others as per project requirement). Complete below steps to enable camera permission.
Follow the steps below to enable camera permission.
4.1 Update Application Tag
The BlockID SDK ensures that no data is shared outside its own secure enclave. To enforce this, application developers must add the following attribute to the <application> tag in the app's AndroidManifest.xml file.
tools:replace="android:allowBackup,android:label,android:theme"
4.2 Add Permissions in Android Manifest
Add the following permissions to the application's AndroidManifest.xml file.
// Add camera permission
<uses-permission android:name="android.permission.CAMERA" />

// Add NFC permission for RFID Scanning
<uses-permission android:name="android.permission.NFC" />

// other permissions ...
<uses-permission android:name="android.permission.INTERNET" />
<uses-permission android:name="android.permission.ACCESS_NETWORK_STATE" />
4.3 Request Camera Permission
Request camera permissions within your application code:
ActivityCompat.requestPermissions(this, new String[] { Manifest.permission.{your_permission}}, PERMISSION_REQUEST_CODE );
Step 5: Add Gradle Dependencies
Since the BlockID SDK depends on other libraries, you must add the following dependencies to your project.
5.1 Application Level Dependencies
The following section lists all the dependencies—along with their respective purposes—that must be added to the application-level build.gradle file:
-
Add the following configuration to the build.gradle file.
// Secure shared preferenceimplementation 'androidx.security:security-crypto:1.1.0-alpha06'// Fingerprint and biometricimplementation 'androidx.biometric:biometric:1.1.0'// Network callimplementation 'com.github.amitshekhariitbhu.Fast-Android-Networking:android-networking:1.0.4' -
Add the following configuration to resolve
bouncycastledependency conflicts:android {...}configurations.configureEach {resolutionStrategy.eachDependency { DependencyResolveDetails details ->if (details.requested.group == 'org.bouncycastle') {details.useVersion '1.84'}if (details.requested.group == 'com.fasterxml.jackson.core') {details.useVersion '2.19.2'}}} -
Add the following block to resolve
META-INFfile conflicts:android {...packagingOptions {exclude 'META-INF/rxjava.properties'exclude 'lib/x86_64/darwin/libscrypt.dylib'exclude 'lib/x86_64/freebsd/libscrypt.so'exclude 'lib/x86_64/linux/libscrypt.so'exclude 'META-INF/INDEX.LIST'exclude 'META-INF/LICENSE.md'exclude 'META-INF/DEPENDENCIES'exclude 'META-INF/NOTICE.md'exclude 'AndroidManifest.xml'exclude 'META-INF/FastDoubleParser-LICENSE'exclude 'META-INF/FastDoubleParser-NOTICE'exclude 'META-INF/DISCLAIMER'exclude 'META-INF/io.netty.versions.properties'}}
Step 6: Enable Proguard
Add the following rules to the proguard-rules.pro file if you want to obfuscate your application code.
-keep class com.onekosmos.blockid.sdk.** { *; }
-keep public class org.** { *; }
Step 7: Gradle Properties
Add the following line to the gradle.properties file:
android.enableJetifier=true
Step 8: Application Deployment
Deploy your Android application as usual after integrating the BlockID SDK, as it does not require any additional deployment steps.
Initial SDK Setup
The BlockID SDK has now been added to your application. To access its features, you need to provide the License Key, Wallet, and Tenant details.
To access the SDK, reach out to your 1Kosmos representative.
The information must be set in the following sequence only and MUST NOT be changed.
Step 1: Initialize SDK
The Android BlockID SDK must be initialized to ensure all its key components are properly set up and functioning. Other SDK functions should only be called after the initialization process is complete.
Add the following line to your application code to initialize the BlockID SDK:
BlockIDSDK.initialize(<the_context>);
Step 2: Set License Key
The license key must be set each time the application is launched.
Whenever the license key is set, the SDK internally checks whether:
- the given license key is valid
- the application is authorized to use the provided license key
Add the following code to your application to set the license key:
BlockIDSDK.getInstance().setLicenseKey("<your_license_key>")
Step 3: Initialize Wallet
Before registering a tenant, a temporary application wallet must be created. An application can only have one wallet, so the temporary wallet must be created ONLY once.
Add the following code to initialize the temporary wallet:
BlockIDSDK.getInstance().initiateWallet();
Step 4: Register Tenant
Tenant can be represented as the value or an object on which API calls can be registered. The application is expected to register tenant ONLY once. If an existing tenant is set, the application will load it after validating the license key. SDK will only allow tenant registry IFF the license key is set.
Tenant object is represented using BIDTenant class and can be created using below code.
BIDTenant bidTenant = new BIDTenant("your_tenant_tag", "your_community", "your_dns_url");
After BIDTenant object is created, tenant registration API must be called. Add below code to register tenant with BlockID SDK.
BlockIDSDK.getInstance().registerTenant(bidTenant, BIDTenantRegistryCallback);
The registered tenant details will be used when APIs will get executed while enrolling documents, or while getting a public key. When this function is executed, the Ethereum wallet gets created and a Distributed Identifier along with 12 Mnemonic phrases (recovery phrases) will be available for the user.
Step 5: Commit Wallet
Upon successful tenant registration, the commit wallet method must be called. The method must be invoked only once:
BlockIDSDK.getInstance().commitApplicationWallet();
The commit wallet method is the final step in setting up the BlockID SDK within an Android application.
SDK Security
As the attack surface of an API is broader than that of a standalone application, the BlockID SDK implements a locking mechanism to prevent unauthorized access.
For security purposes, the following points must be implemented in the application:
- The SDK should be locked when the application moves to the background.
- The SDK should be locked when the application displays the login screen to users.
- The SDK’s lock status should be checked before calling any enrollment APIs.
For more information on the methods used in this section, see API Reference Guide for Android.