Native Integration Guide
This document provides a step-by-step guide on how to install, integrate and initialize the BlockID SDK into any iOS application.
Prerequisites
Below are few general and platform specific dependencies required to integrate BlockID SDK into an iOS application.
General
- An understanding of how to develop applications for iOS
- At least one compatible iOS mobile device
Technical
- Xcode 16.0 or higher
- Deployment target of iOS 15.0 or later
- Swift 5.9 or higher
- CocoaPods 1.15.0 or higher
- Device support:
- iPhone SE (1st, 2nd, and 3rd generations)
- iPhone 6s or later
- iPod Touch (7th generation) or later
Integration Overview
This section provides a step-by-step guide on how to set up and integrate the BlockID SDK into an iOS application. The examples below demonstrate the integration of the BlockID SDK into a new iOS project. The same steps can also be used for integrating it into an existing application.
The screenshots in this section were generated using Xcode 16.0.
Step 1: Create a New Application
- Open Xcode
- Select File -> New -> Project
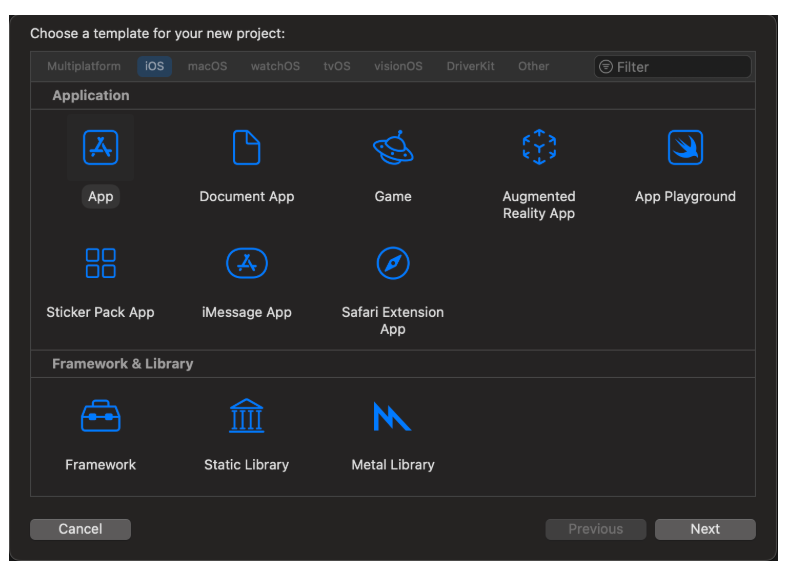
- Choose the Single View App template
- Click Next
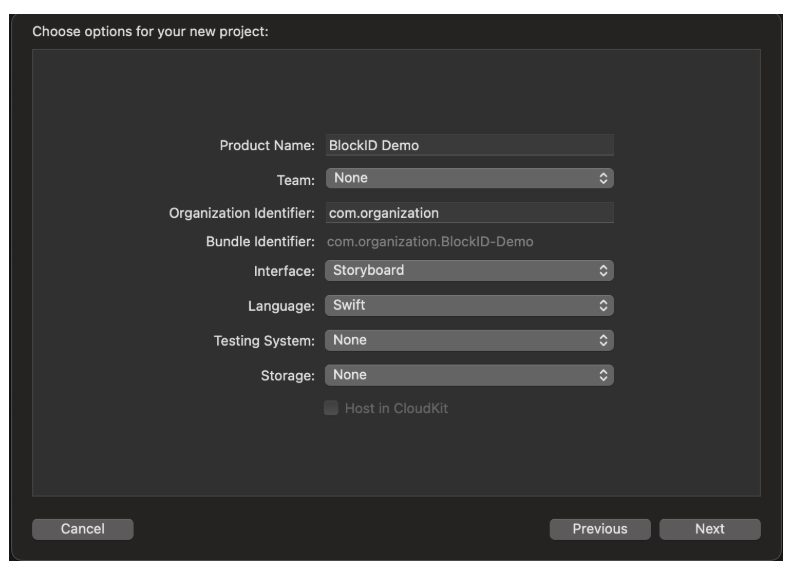
- Set the Product Name to BlockID Demo. Leave all other settings at their default values.
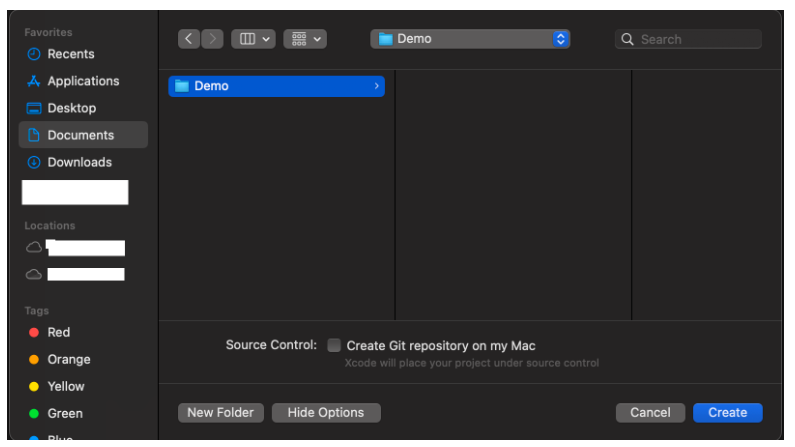
- Click Next and choose a location to save your project.
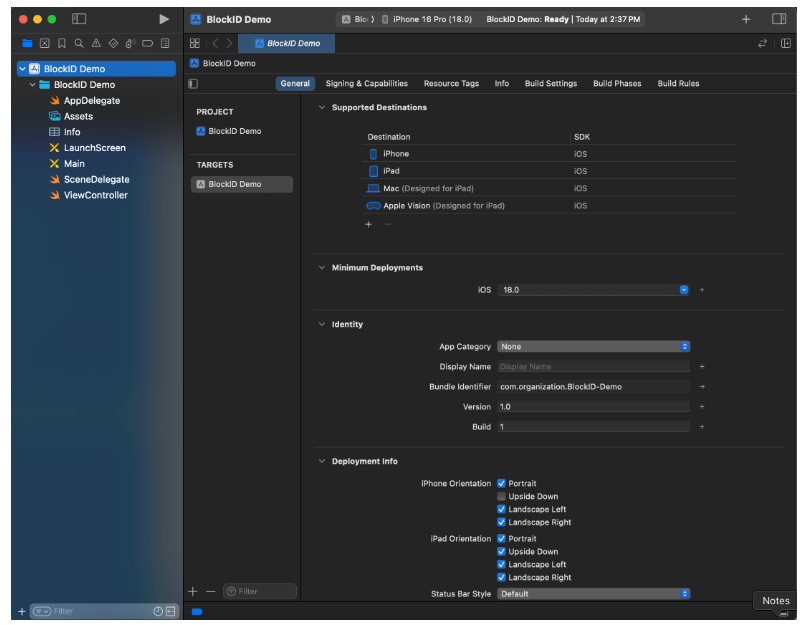
- Click Create. The project will open automatically, as shown below.
Step 2: Setup CocoaPods
2.1 Install CocoaPods
Installing the BlockID iOS SDK via CocoaPods automates most of the installation process for you. Before beginning, make sure that you are using Ruby 2.0.0 or higher.
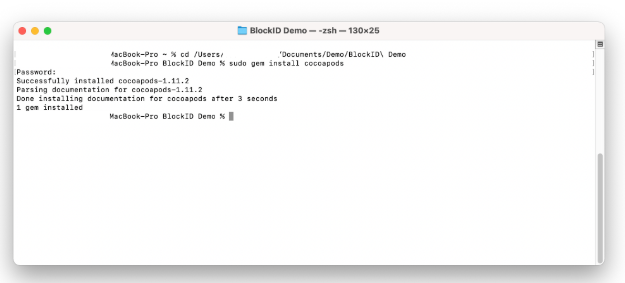
- Open a terminal and run the following command to install CocoaPods:
sudo gem install cocoapods
2.2 Construct the Podfile
Now that CocoaPods is installed, the next step is to create a Podfile in your Xcode project directory.
In this example, the Podfile is created using the Terminal. However, you can use any method to create the file.
a. In the Terminal, navigate to the root directory of your BlockID Demo project b. Run the following command to create the Podfile:
touch Podfile
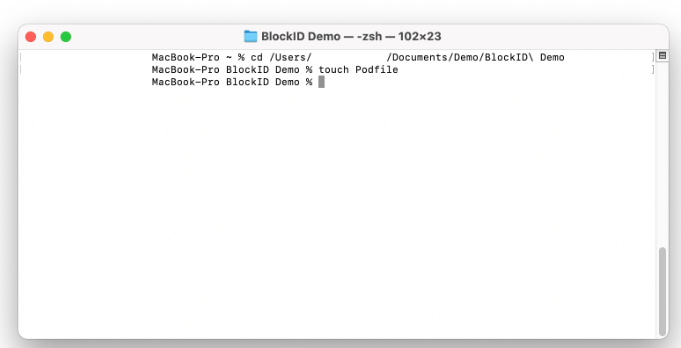
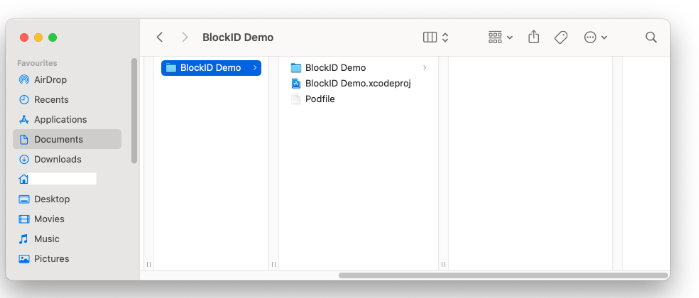
The Podfile is created in the root directory of the BlockID Demo project.
Step 3: Add BlockID SDK
3.1 CocoaPods Integration (Recommended)
Installation of the BlockID iOS SDK using CocoaPods is supported from version 1.15.0 onwards.
3.1.1 Add BlockID SDK Library
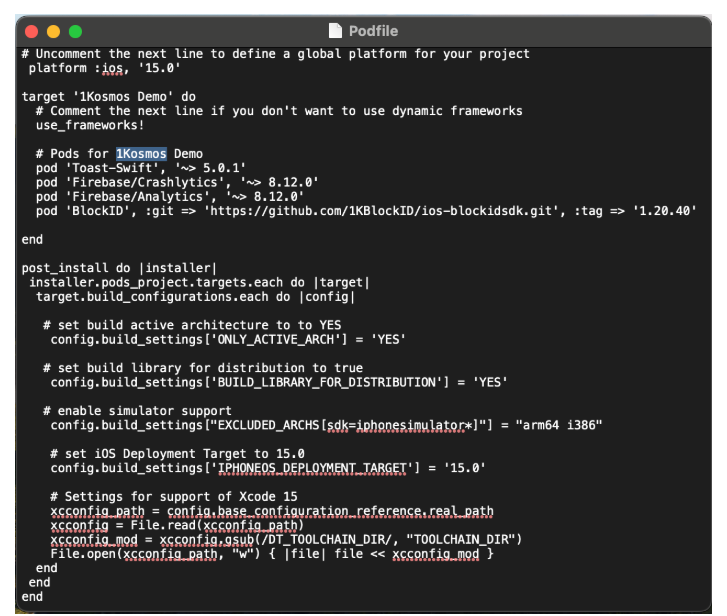
Add the following lines to your Podfile:
# As BlockID SDK support is from iOS 15.0, this example sets the platform OS as 15.0
 platform :ios, '15.0'

target 'BlockID Demo' do
  # Comment the next line if you don't want to use dynamic frameworks
  use_frameworks!

  pod 'BlockID', :git => 'https://{gituser}:{gittoken}@github.com/1KBlockID/ios-blockidsdk.git', :tag => '1.20.50'

end
end

post_install do |installer|
 installer.pods_project.targets.each do |target|
  target.build_configurations.each do |config|

   # set build active architecture to YES
    config.build_settings['ONLY_ACTIVE_ARCH'] = 'YES'

    # set build library for distribution to YES
    config.build_settings['BUILD_LIBRARY_FOR_DISTRIBUTION'] = 'YES'

    config.build_settings["EXCLUDED_ARCHS[sdk=iphonesimulator*]"] = "arm64 i386"
  end
 end
end
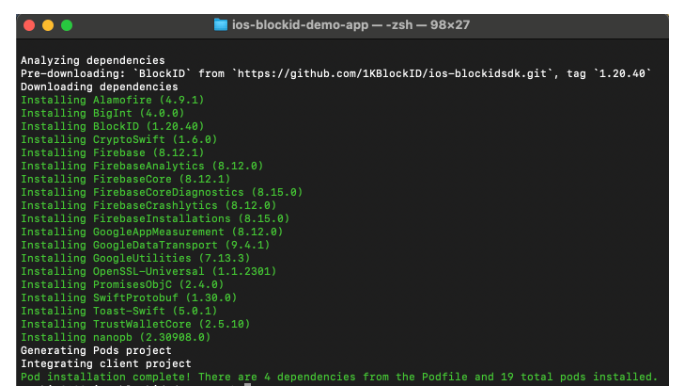
The screenshots below were captured while installing version 1.20.40, and should be updated to reflect the latest version 1.20.50.
3.1.2 Install BlockID SDK
To install the BlockID SDK as a pod, open your terminal, navigate to your Xcode project directory, and run the following command.
pod install
The BlockID SDK has dependencies on other pods. Therefore, when the BlockID SDK is installed, all required dependencies will be installed automatically.
Step 4: Enable Permissions
Add the following permissions to your application. The value for each key should be updated according to your project requirements.
// for NFC reading capability during passport scan
<key>NFCReaderUsageDescription</key>
<string>Allow permission in order to scan your passport</string>

// custom message to show during NFC reading
<key>NFCUserMessageDuringRFIDScan</key>
<string>Hold your iPhone near an NFC enabled passport.</string>

// set camera usage description
<key>NSCameraUsageDescription</key>
<string>Enable camera access to enable Live id and document scanning</string>

// set FaceID usage description
<key>NSFaceIDUsageDescription</key>
<string>Face ID is needed to log in</string>

// set location usage description
<key>NSLocationAlwaysAndWhenInUseUsageDescription</key>
<string>Your current location will be required.</string>

// set location usage description
<key>NSLocationWhenInUseUsageDescription</key>
<string>Your current location will be required.</string>

// set photo library usage description
<key>NSPhotoLibraryUsageDescription</key>
<string>Enable photo libarary to save screenshots</string>

// set NFC reading identifier; the value must be same as given here
<key>com.apple.developer.nfc.readersession.iso7816.select-identifiers</key>
<array>
  <string>A0000002471001</string>
</array>
Step 5: Add Near Field Communication Tag
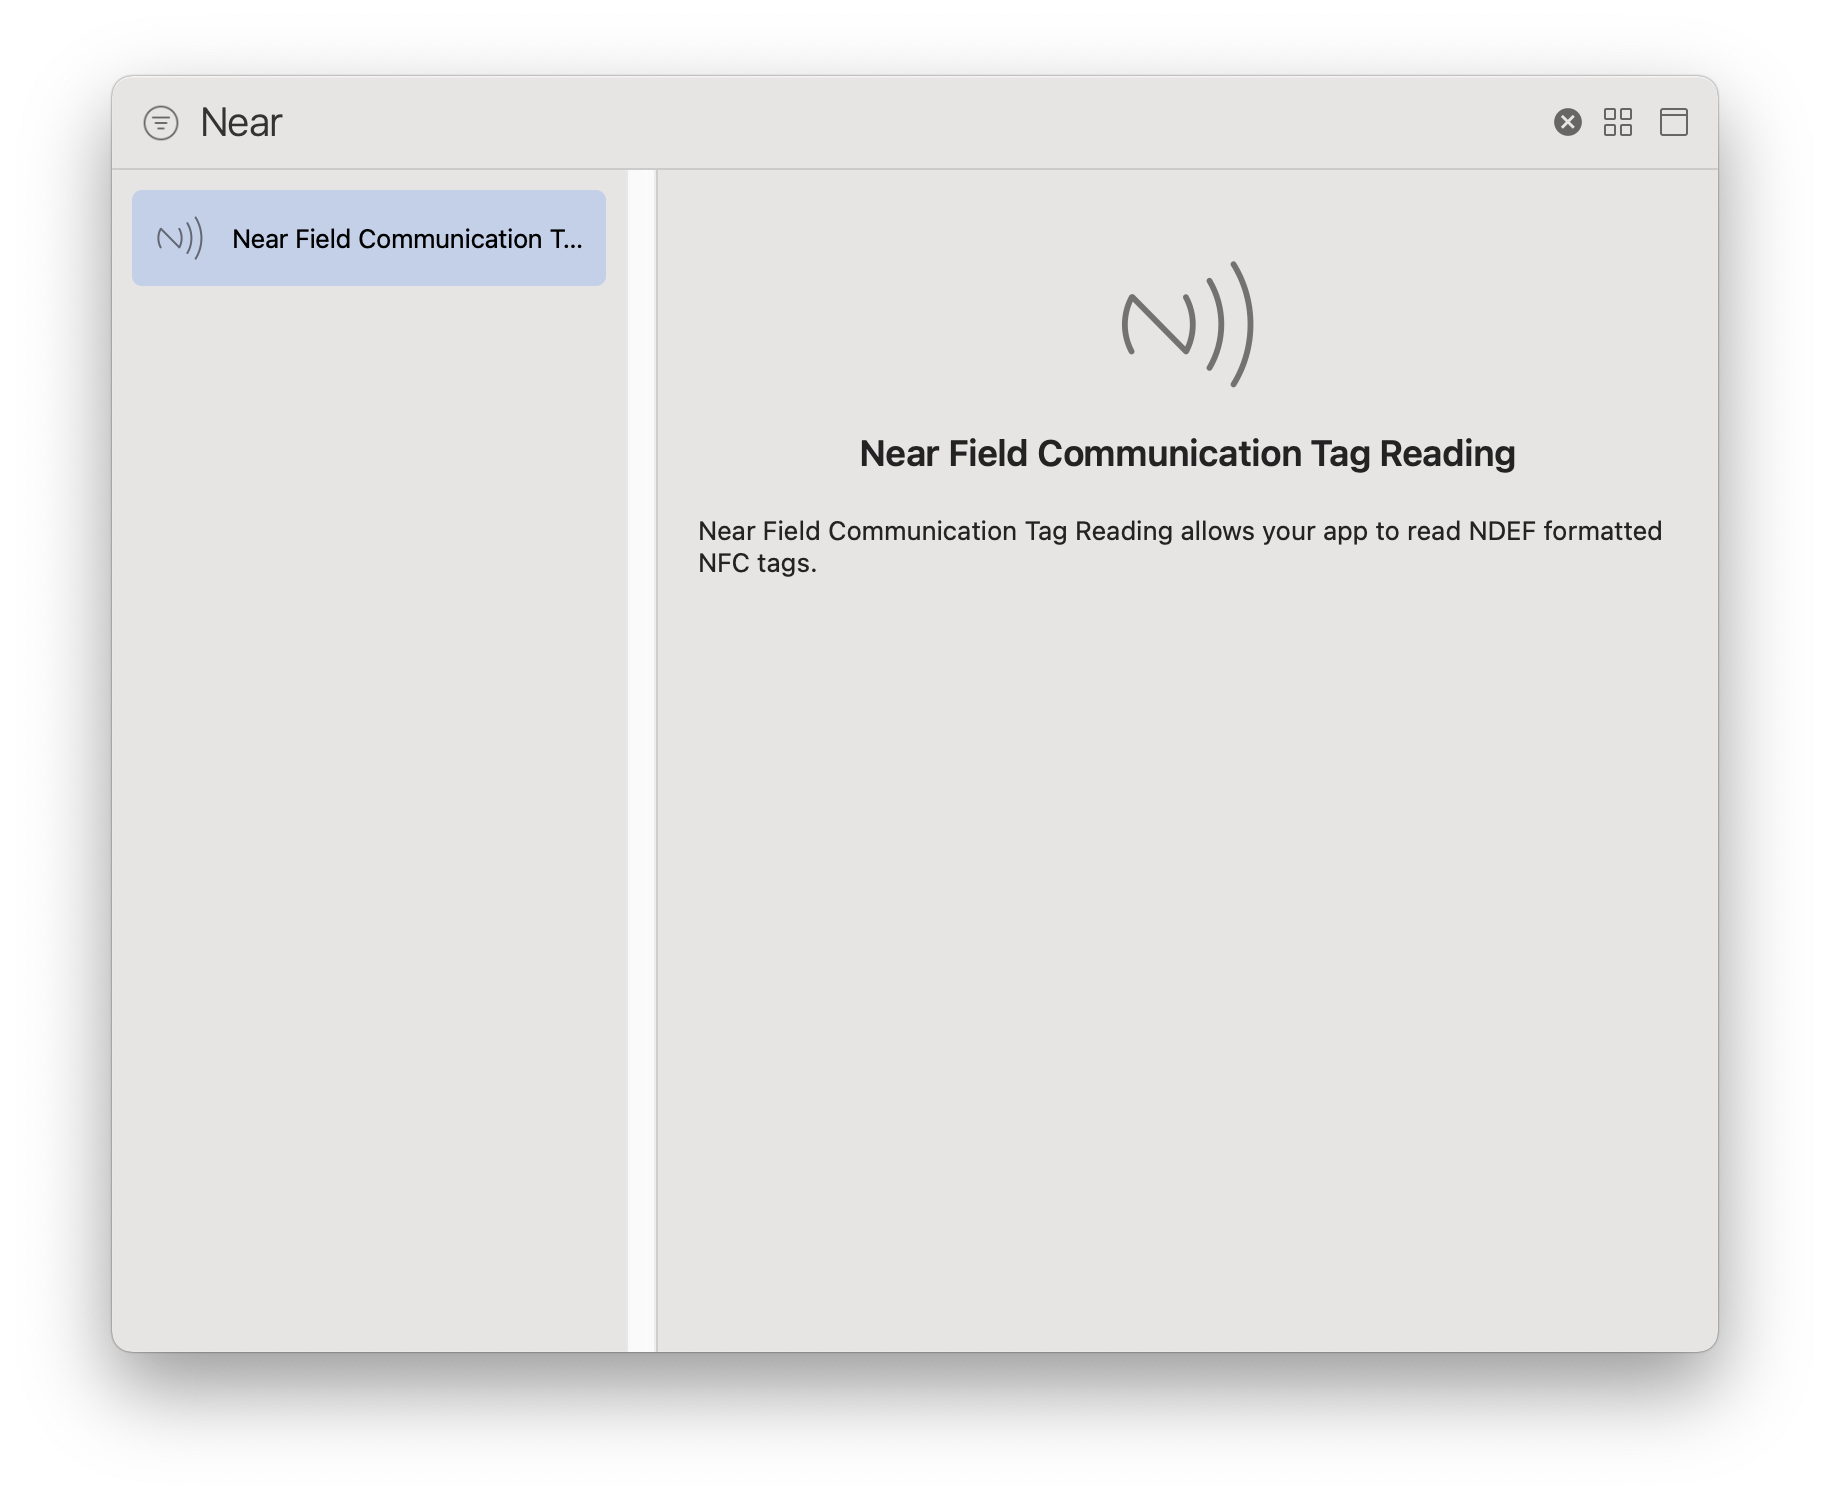
Add the Near Field Communication Tag Reading capability to your project. This is required if your application will use the passport scan feature.
To add it:
- Open your application's Target → Signing & Capabilities tab.
- Click the + button.
- Search for Near Field Communication Tag Reading and select it to add the capability to your project.
Step 6: Application Deployment
Deploying an iOS application, integrated with BlockID SDK (.xcframework), does not require any additional steps outside of the typical process
Step 7: Run the Application
The setup of a new (or existing) application to include the BlockID SDK is now complete. You can now compile the project to verify that there are no build errors.
Data encryption may take longer when running the app in Debug mode. It is recommended (but not mandatory) to switch the application scheme to Release mode before running the app for better performance during encryption.
Initial SDK Setup
The BlockID SDK has now been added to your application. To access its features, you need to provide the License Key, Wallet, and Tenant details.
To access the SDK, reach out to your 1Kosmos representative.
The information must be set in the following sequence only and MUST NOT be changed.
Step 1: Set License Key
The license key must be set each time the application is launched.
Whenever the license key is set, the SDK internally checks whether:
- the given license key is valid
- the application is authorized to use the provided license key
Add the following code to your application to set the license key:
BlockIDSDK.sharedInstance.setLicenseKey(key: "<your_license_key>")
Step 2: Initialize Wallet
Before registering a tenant, a temporary application wallet must be created. An application can only have one wallet, so the temporary wallet must be created ONLY once.
Add the following code to initialize a temporary wallet:
BlockIDSDK.sharedInstance.initiateTempWallet() { (status, error) in
  //your code here
}
Step 3: Register Tenant
3.1 About Tenant
The tenant represents the value or object on which API calls can be registered.
There are two types of tenants:
- Root Tenant: Stores details about enrolled user biometric information and digital assets.
- Client Tenant: Stores the user's enrolled persona.
A root tenant can also store a user's persona, but a client tenant cannot be used to store biometric data or digital assets.
The application is expected to register a tenant only once. If an existing tenant is set, the application will load it after validating the license key.
The SDK will allow a tenant to be registered only after the license key is set.
The tenant object is represented using the BIDTenant class and can be created using the following code:
let defaultTenant = BIDTenant.makeTenant(tag:"your_tenant_tag", community: "your_community", dns: "your_dns_url")
3.2 Register Tenant
After the object BIDTenantis created the tenant registration API must be called:
BlockIDSDK.sharedInstance.registerTenant(tenant: BIDTenant) { (status, error, tenant) in
  // your code here
}
The tenant details are used during document enrollment and when retrieving a public key. When this function is executed, an Ethereum wallet is created, and a Distributed Identifier (DID) along with 12 recovery mnemonic phrases will be made available to the user.
Step 4: Commit Wallet
Upon successful tenant registration, the commit wallet method must be called. The method must be called only once:
BlockIDSDK.sharedInstance.commitApplicationWallet()
The commit wallet method is the final step for setting up BlockID SDK into an iOS application.
SDK Security
As the attack surface of an API is broader than that of a standalone application, the BlockID SDK implements a locking mechanism to prevent unauthorized access.
For security purposes, the following points must be implemented in the application:
- The SDK should be locked when the application moves to the background.
- The SDK should be locked when the application displays the login screen to users.
- The SDK’s lock status should be checked before calling any enrollment APIs.
For more information on methods used in this section, see the API Reference Guide.