OAuth 2.0 and OIDC Demo Application
We've created a sample OAuth 2.0 and OpenID Connect (OIDC) demo application to showcase the different authentication and authorization flows available to developers. Developers can quickly register an example OAuth2 client and select an example OAuth2 authorization or OAuth2 authorization with OpenID Connect (OIDC).
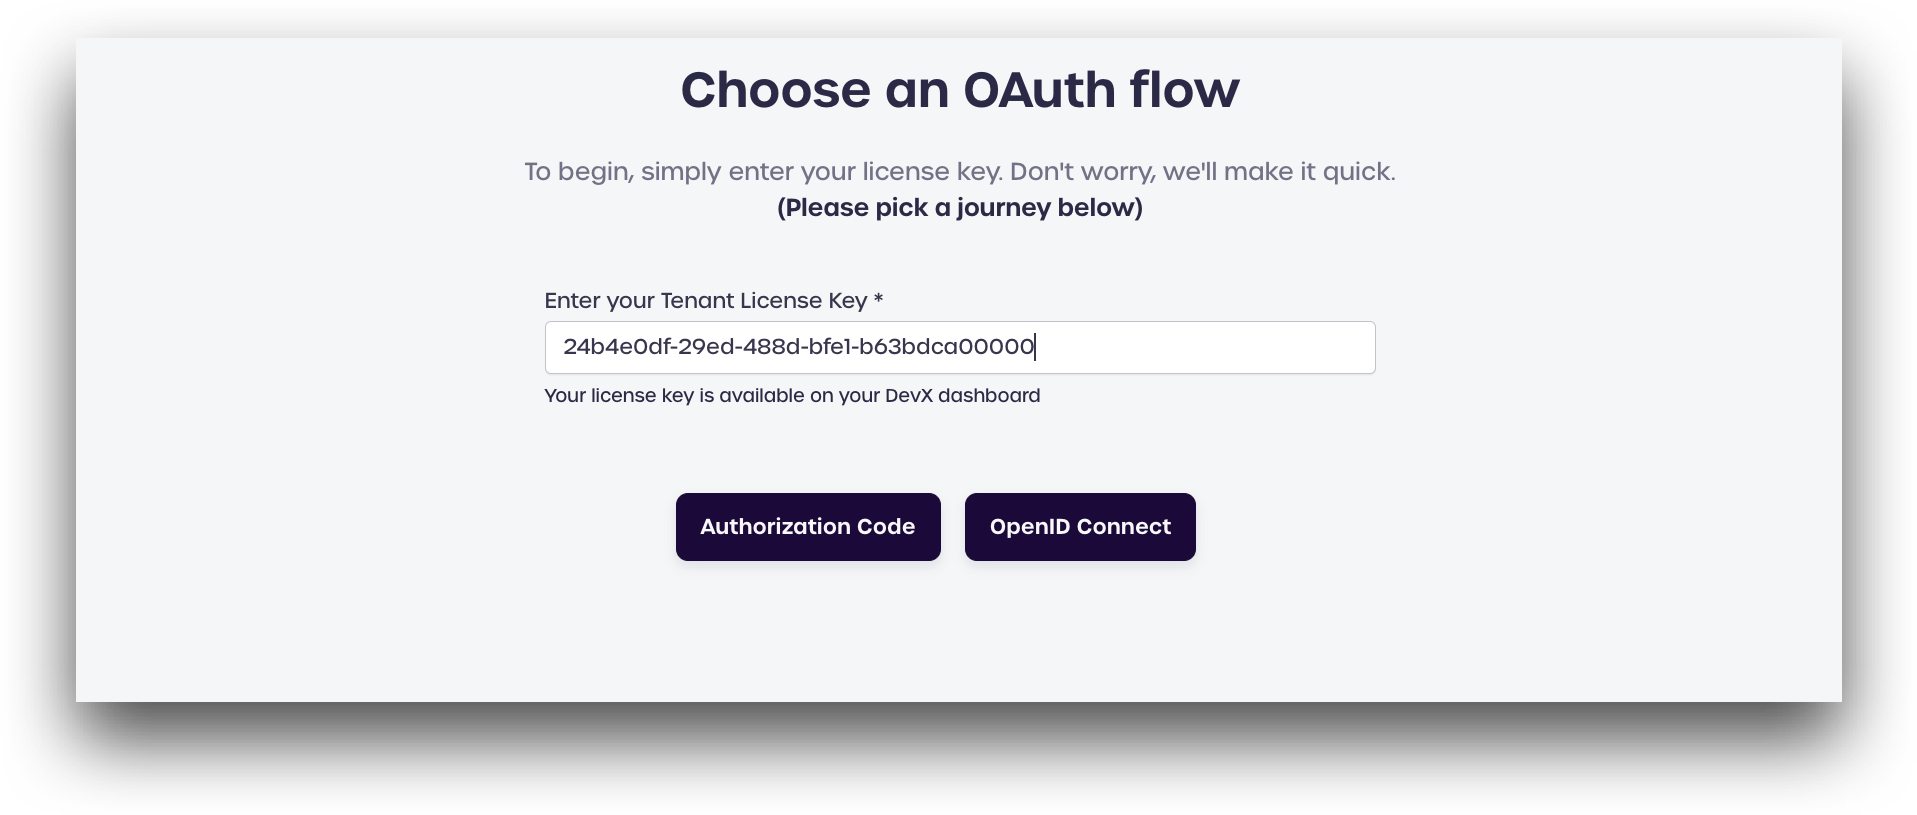
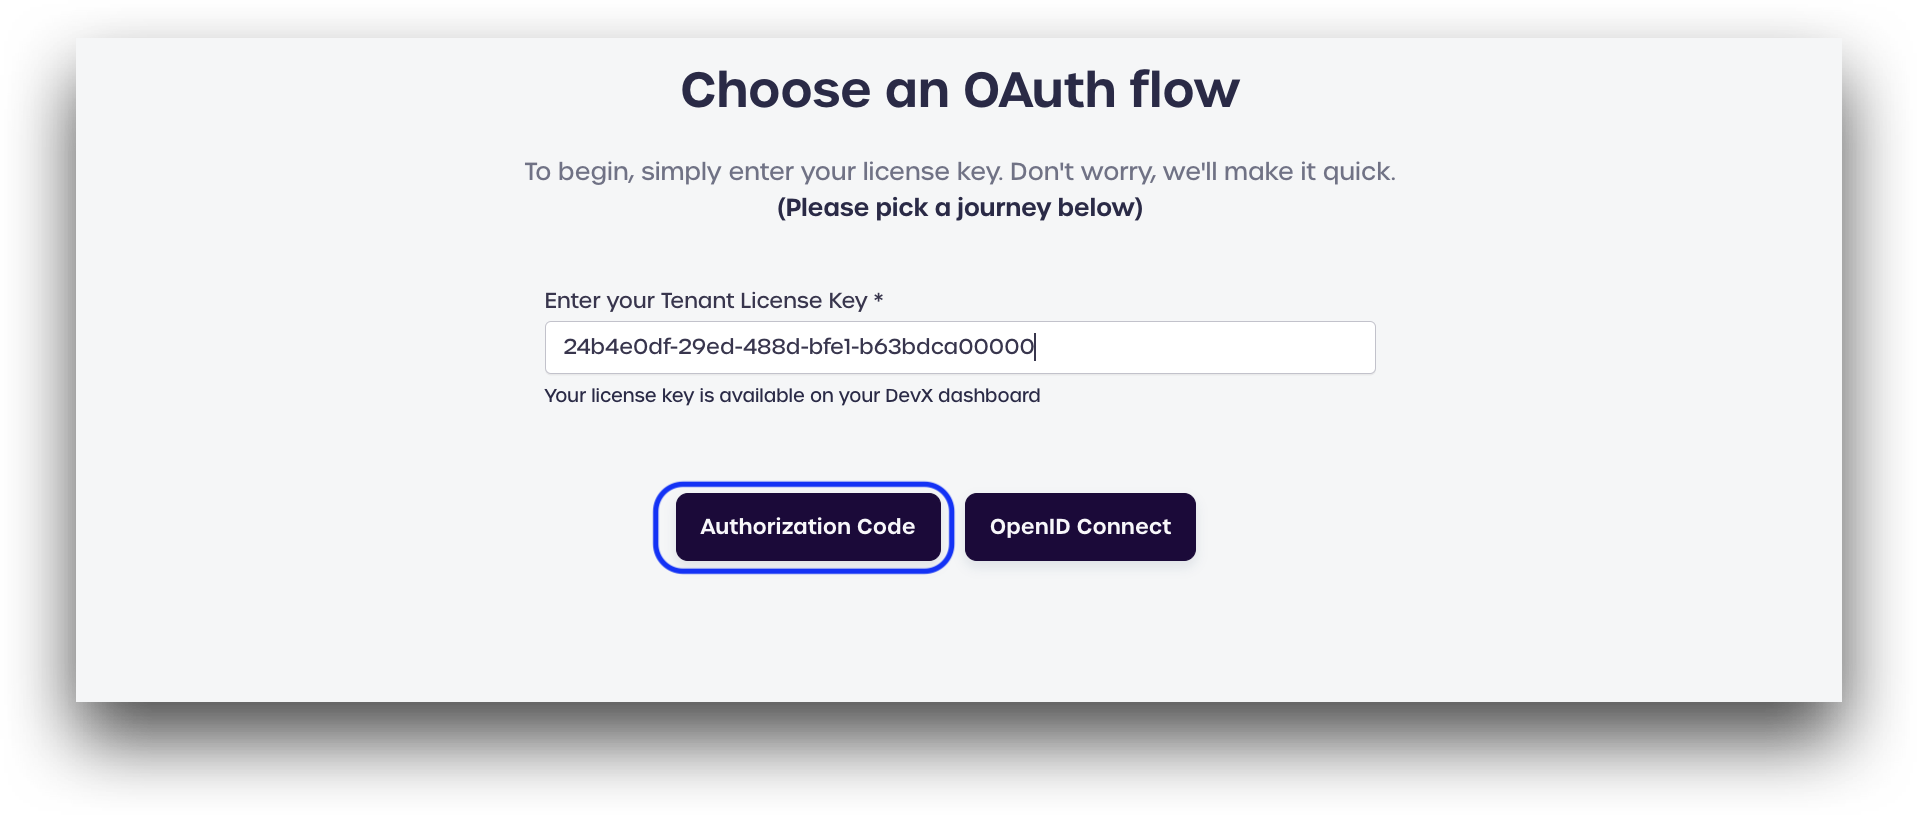
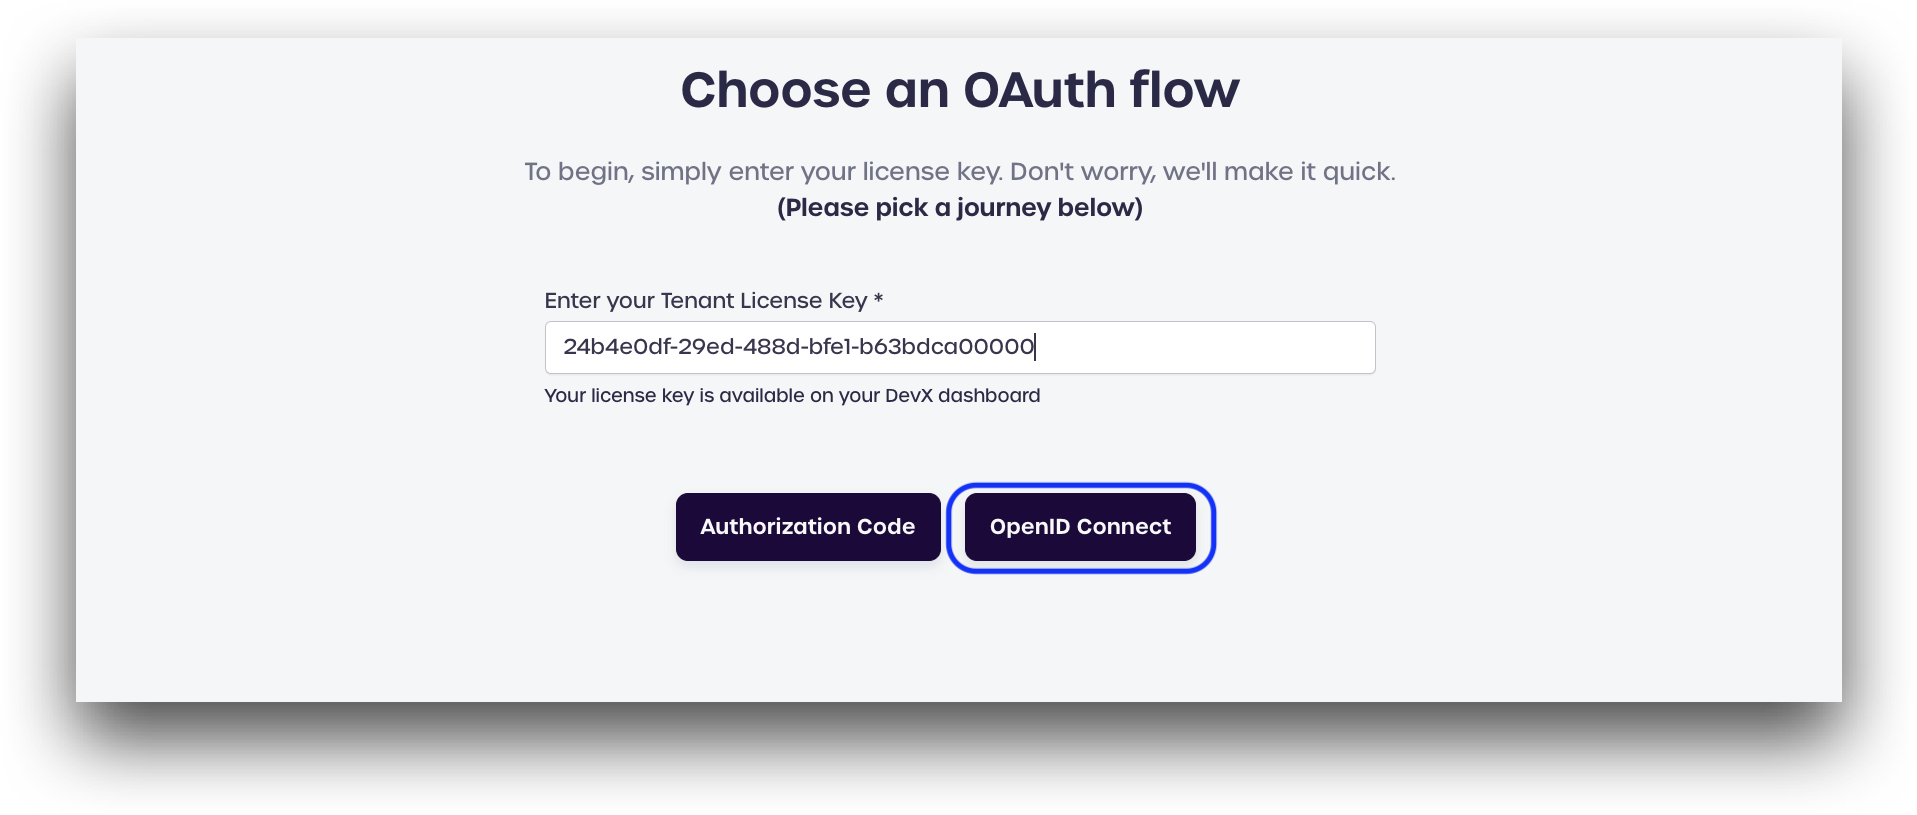
To get started, you will need your tenant license key to use the demo application, which Developers can find on the Developer Dashboard.
Don't have an account? Sign-up for a free BlockID Developer Experience account to obtain your license key and access our BlockID Helper SDKs.
OAuth 2.0 Authorization Code Flow
Getting Started
If you are logged in to your developer account, your tenant license key will automatically be entered on all the DevX Sandbox demo applications
Log in to the BlockID Developer Experience portal to start.
After signing in, navigate to the OAuth 2.0 & OIDC demo application, located in our DevX Sandbox.
Click Authorization Code.
Build the Authorization URL & Redirect to Authorization Server
Before authorization begins, the server first generates a random string to use for the state parameter. The OAuth2 client will need to store the state parameter, as it will be used in the next step.
In this demo application, we automatically generate a random state parameter and build the authorization URL, which can be seen in the box on the bottom right of the page.
Please take note of the state string that is shown, as we will need to verify this in a moment. In this example, our state is 3j4ptFspU4nG×1gBY.
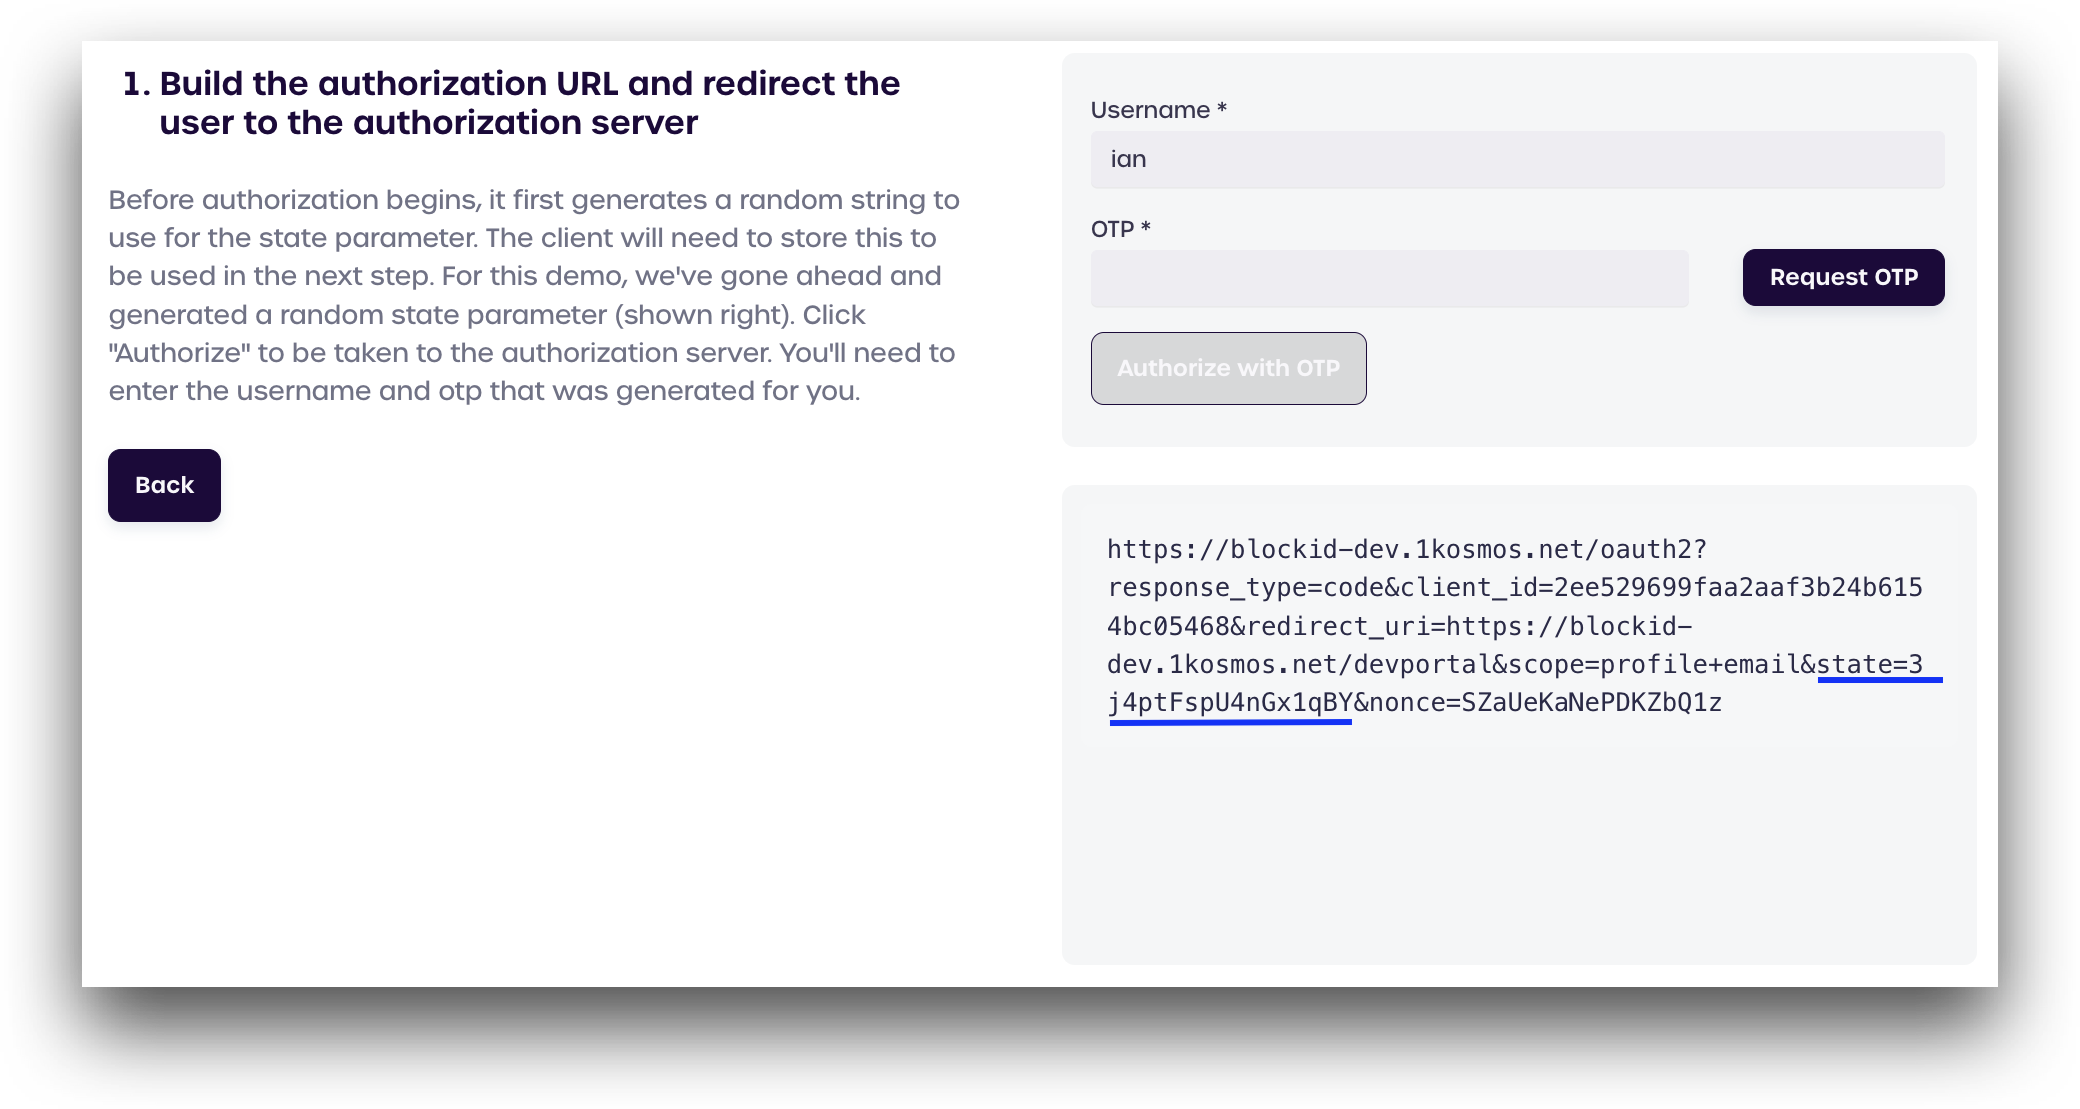
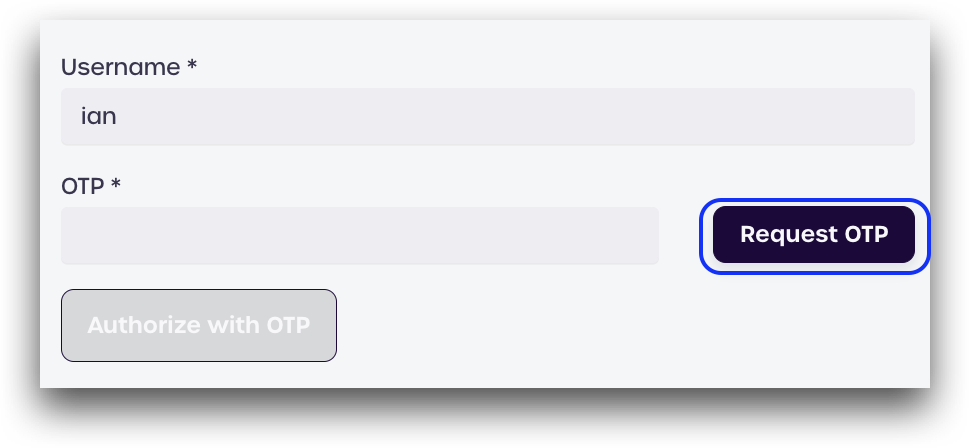
To start, click Request OTP to generate a six-digit One-Time Passcode (OTP).
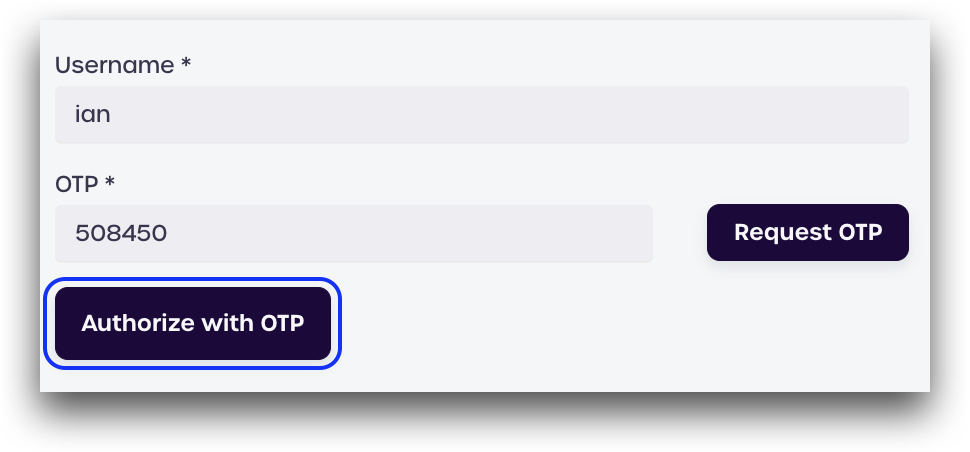
Click Authorize with OTP.
Verify the State Parameter
We next need to verify that our state parameter has the same string that was shown earlier. If we examine our URL in the box on the bottom-right we can see that our state is still 3j4ptFspU4nG×1gBY, which is what we want.
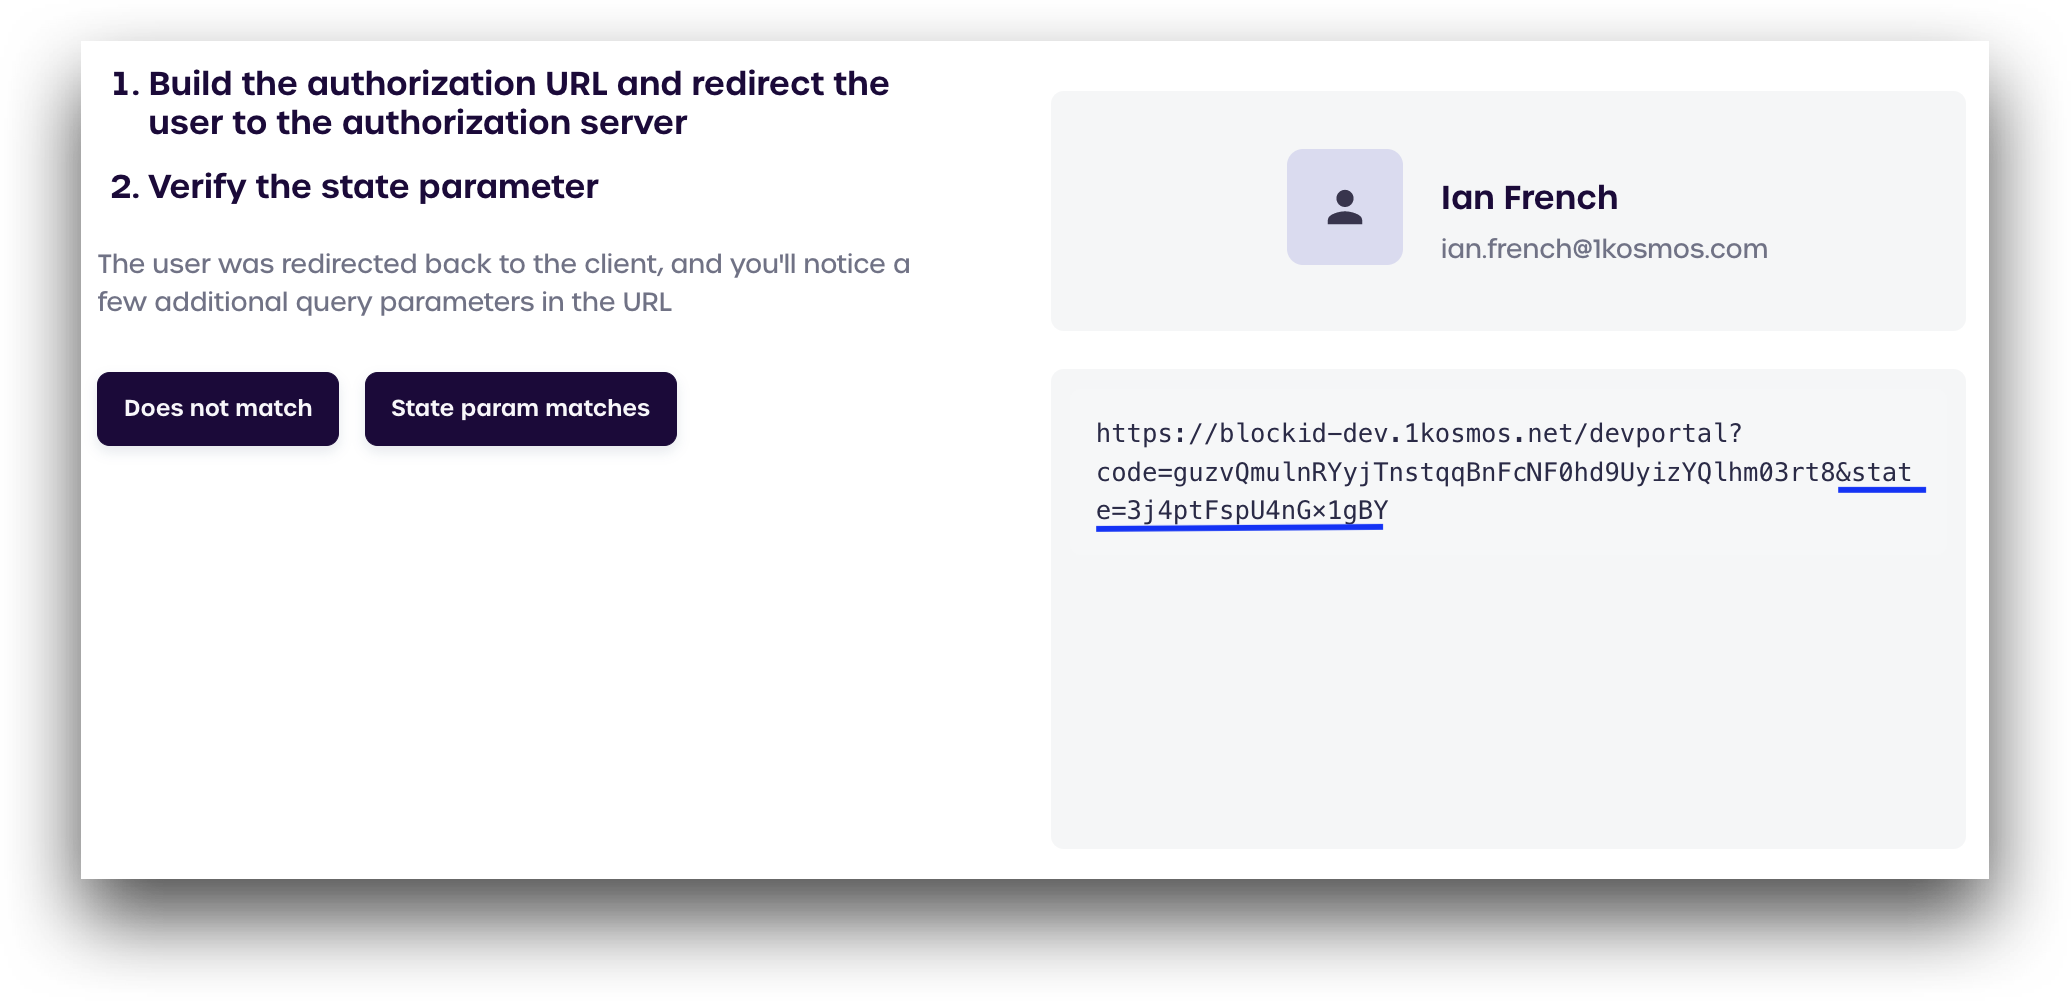
After verifying your state parameter matches, click State param matches.
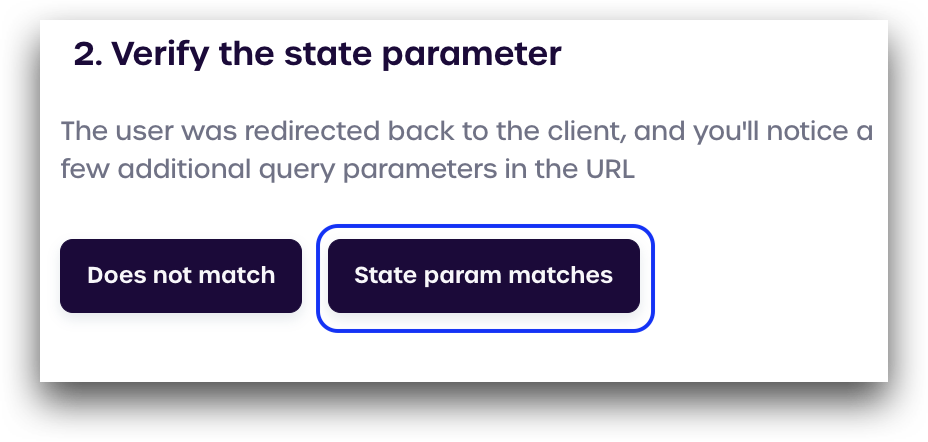
If your state parameter has changed, click Does not match to return to the previous page and generate a new state
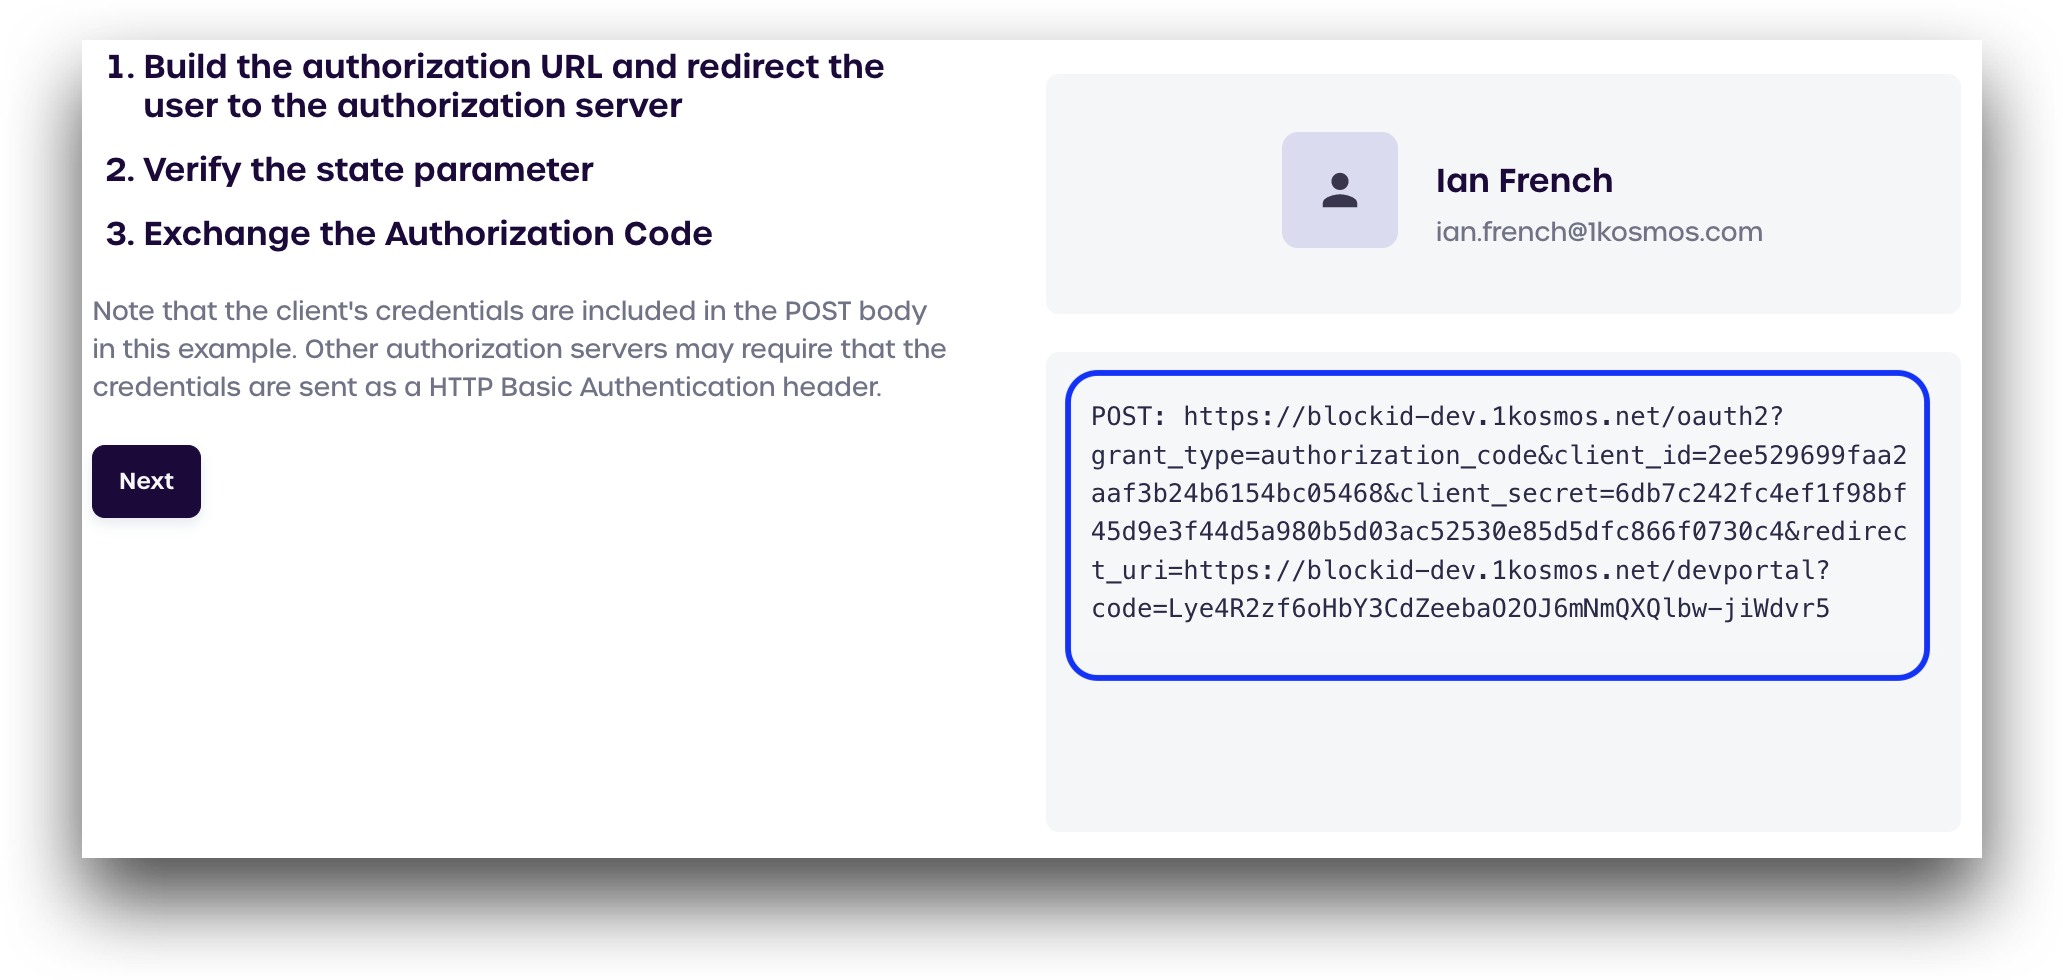
Exchange the Authorization Code
After verifying the state, the URL will update to a POST request containing the OAuth client ID, client secret, and code, which can be seen in the box on the bottom right.
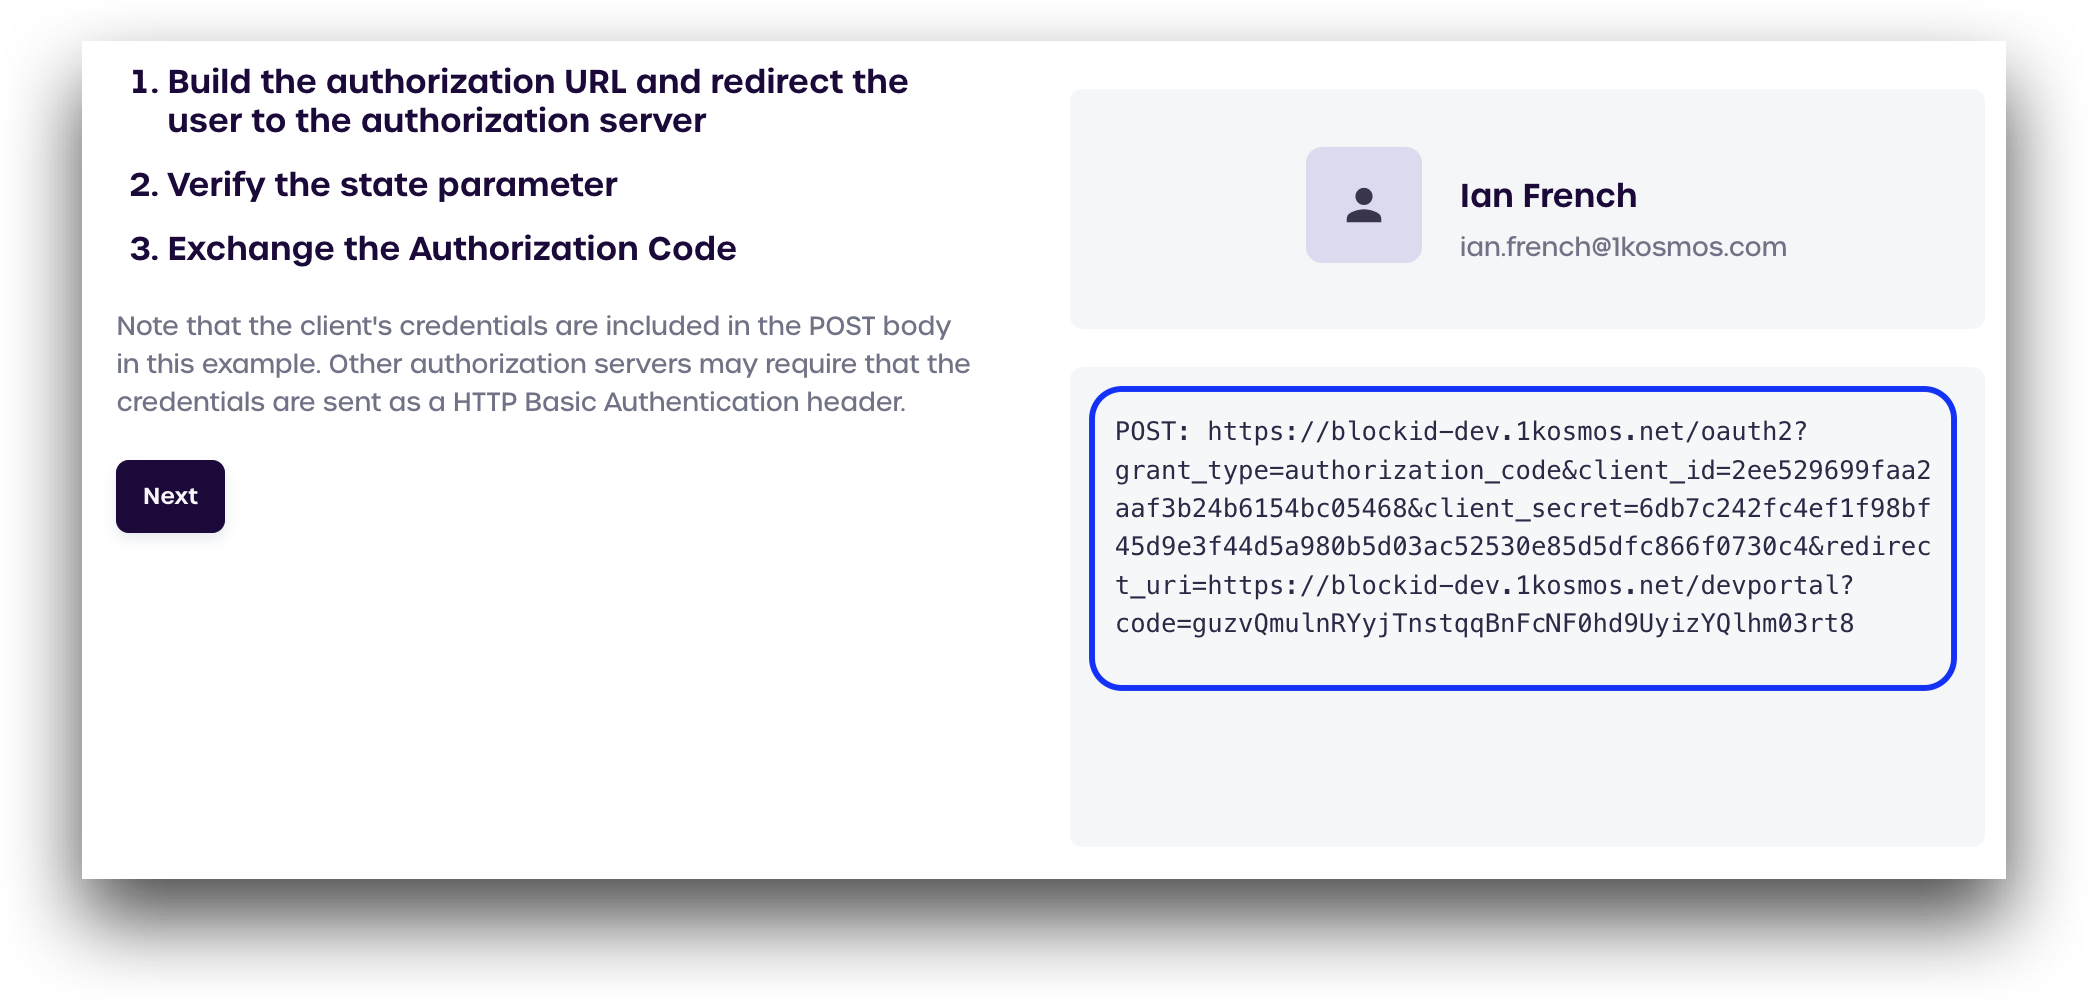
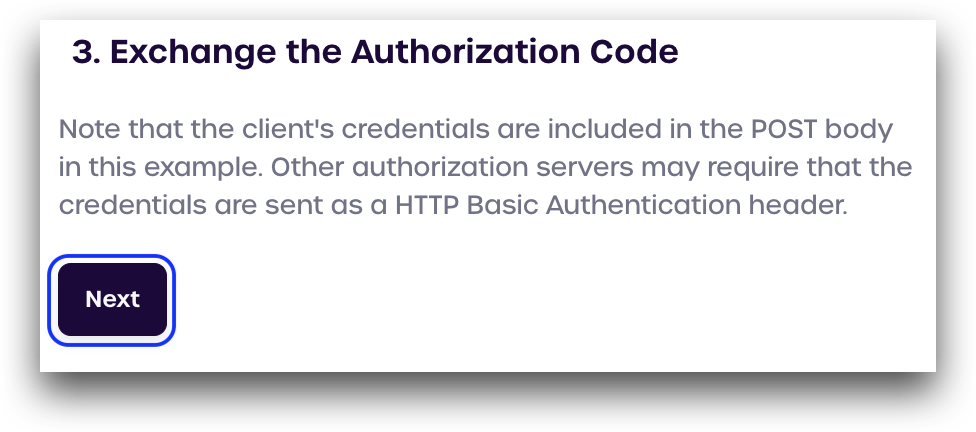
Click Next
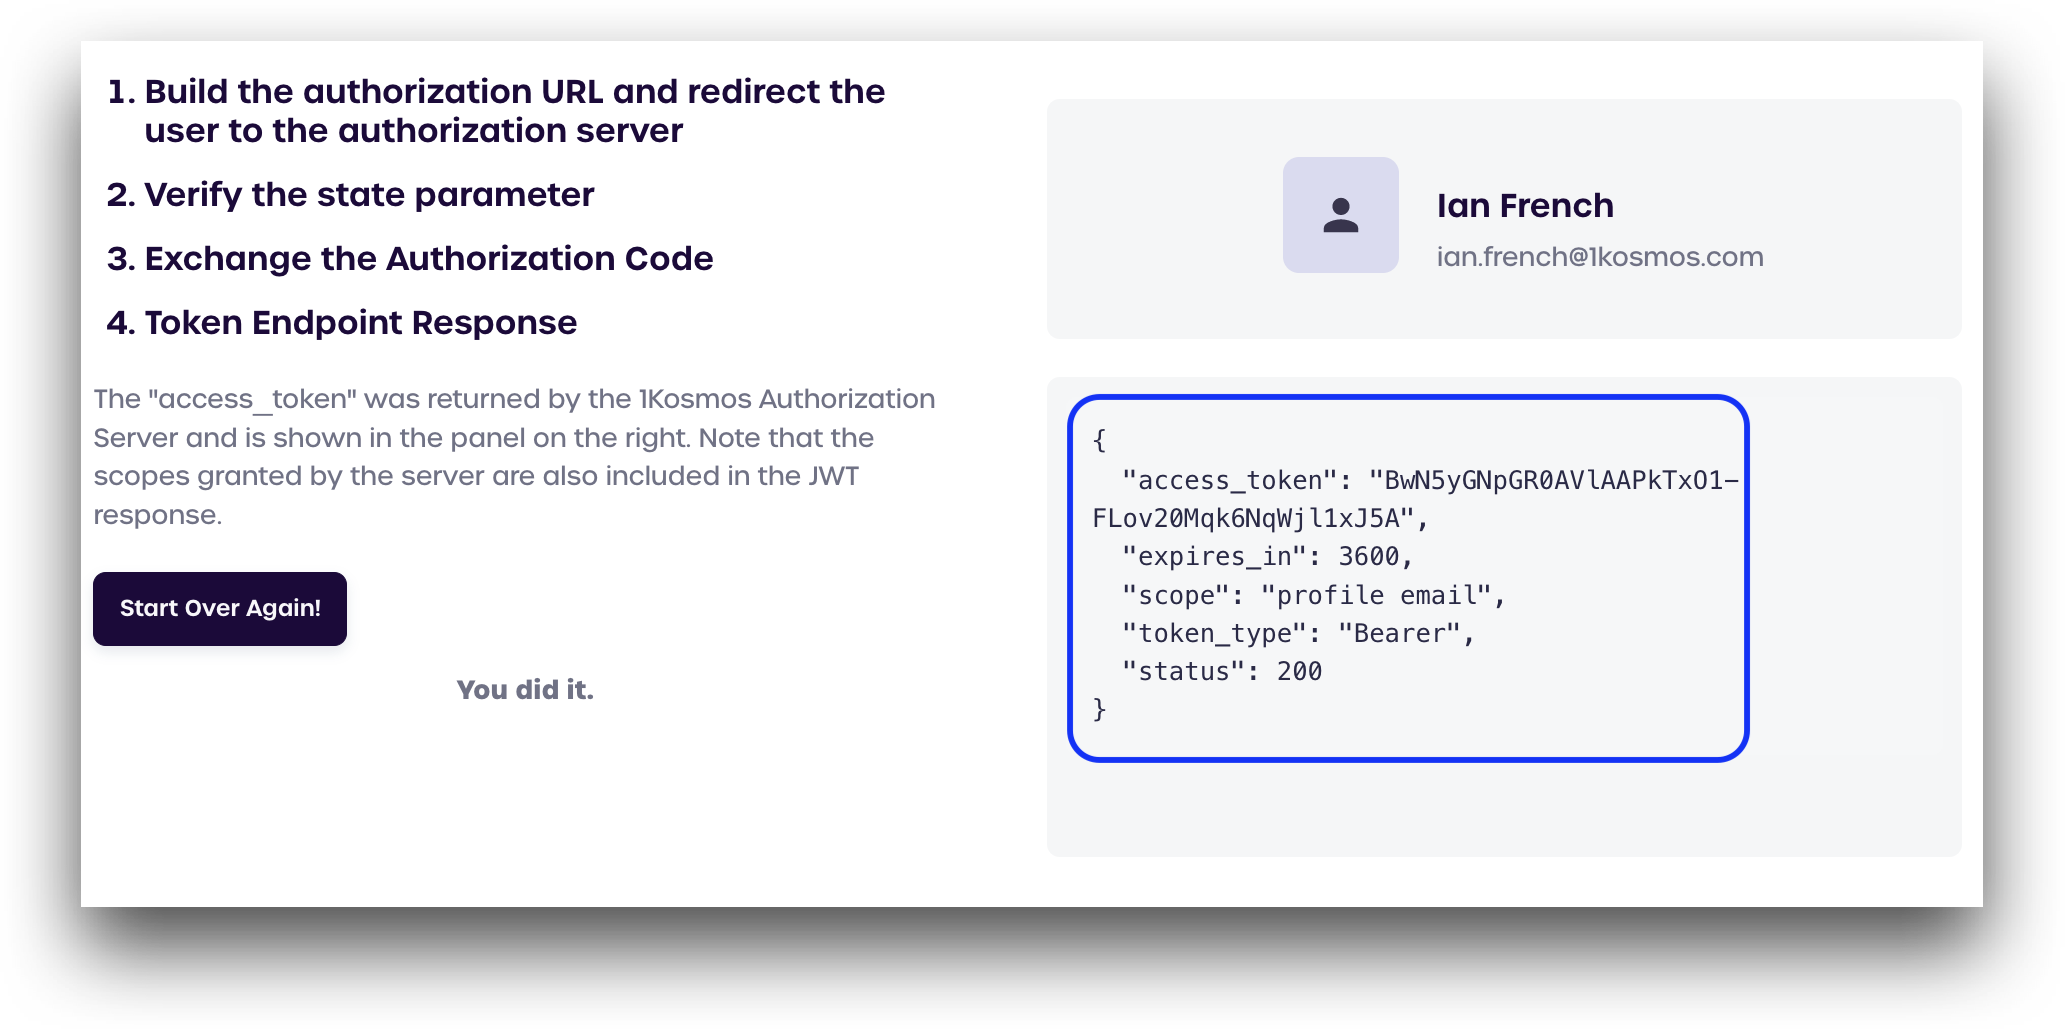
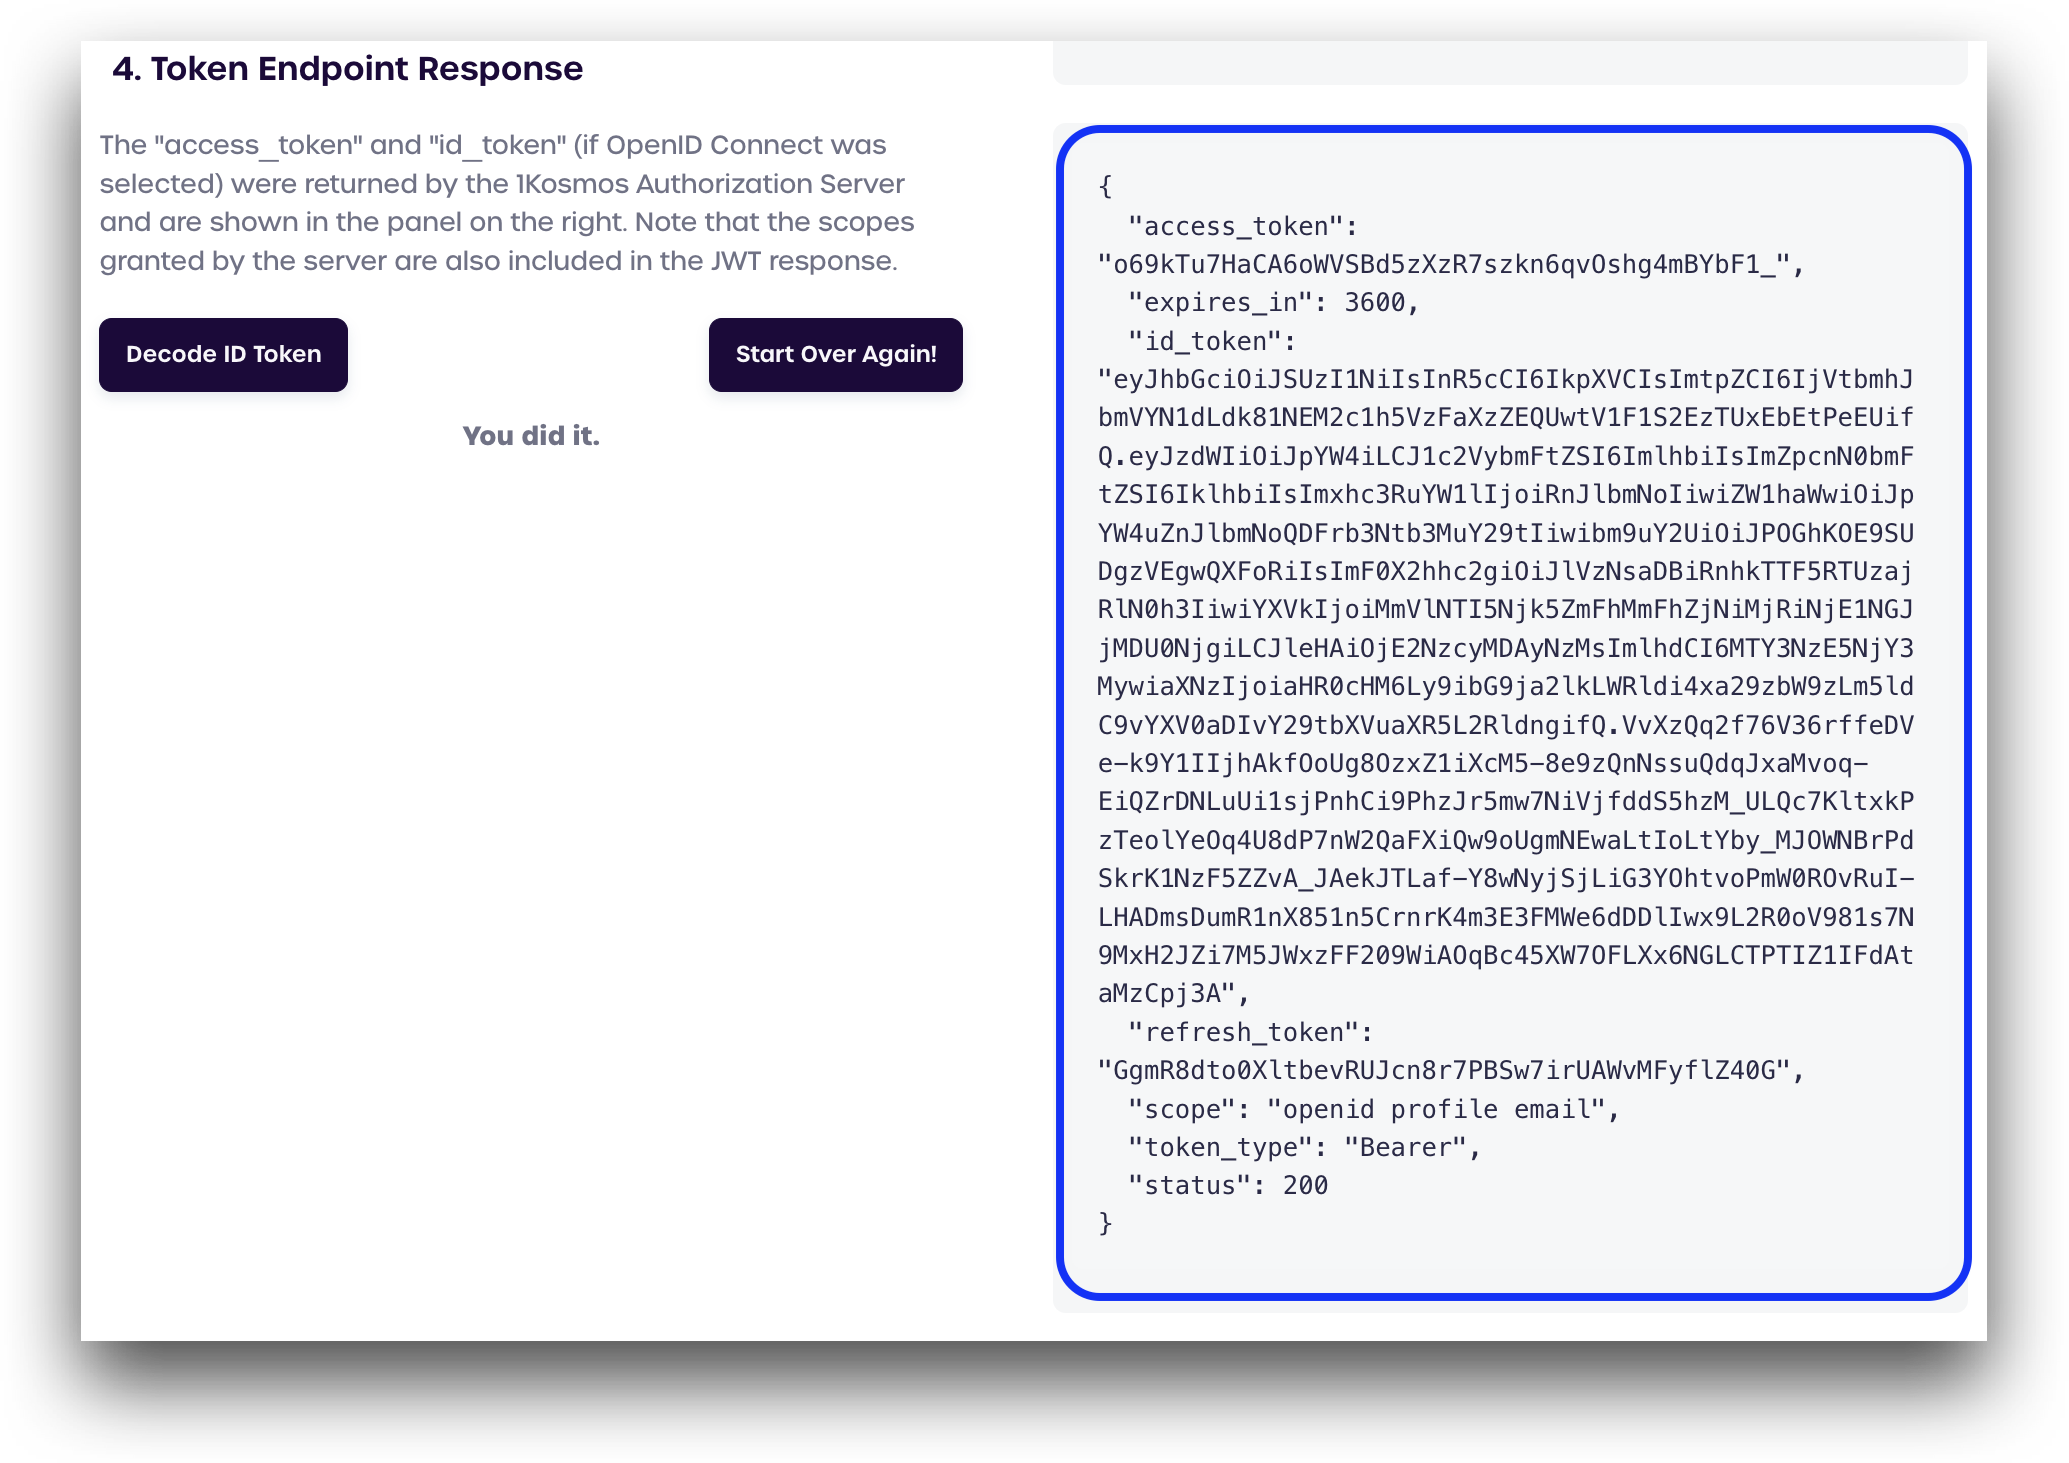
Token Endpoint Response
On this screen, we can see the server successfuly returned a JSON object containing the access_token, completing the OAuth2 authorization flow.
OAuth 2.0 Authorization with OpenID Connect (OIDC) Flow
Getting Started
If you are logged in to your developer account, your tenant license key will automatically be entered on all the DevX Sandbox demo applications
To get started, navigate to the BlockID [Developer Experience] portal and log in.
After signing in, navigate to the OAuth 2.0 & OIDC demo application, located in our DevX Sandbox.
Click OpenID Connect.
Build the Authorization URL & Redirect to Authorization Server
Before authorization begins, the server first generates a random string to use for the state parameter. The OAuth2 & OIDC client will need to store the state parameter as it will be used in the next step.
In this demo application, we automatically generate a random state parameter and build the authorization URL, which can be seen in the box on the bottom right of the page.
Please take note of the state string that is shown, as we will need to verify this in a moment. In this example, our state is XnUvMMMCyKbQ6s2pw.
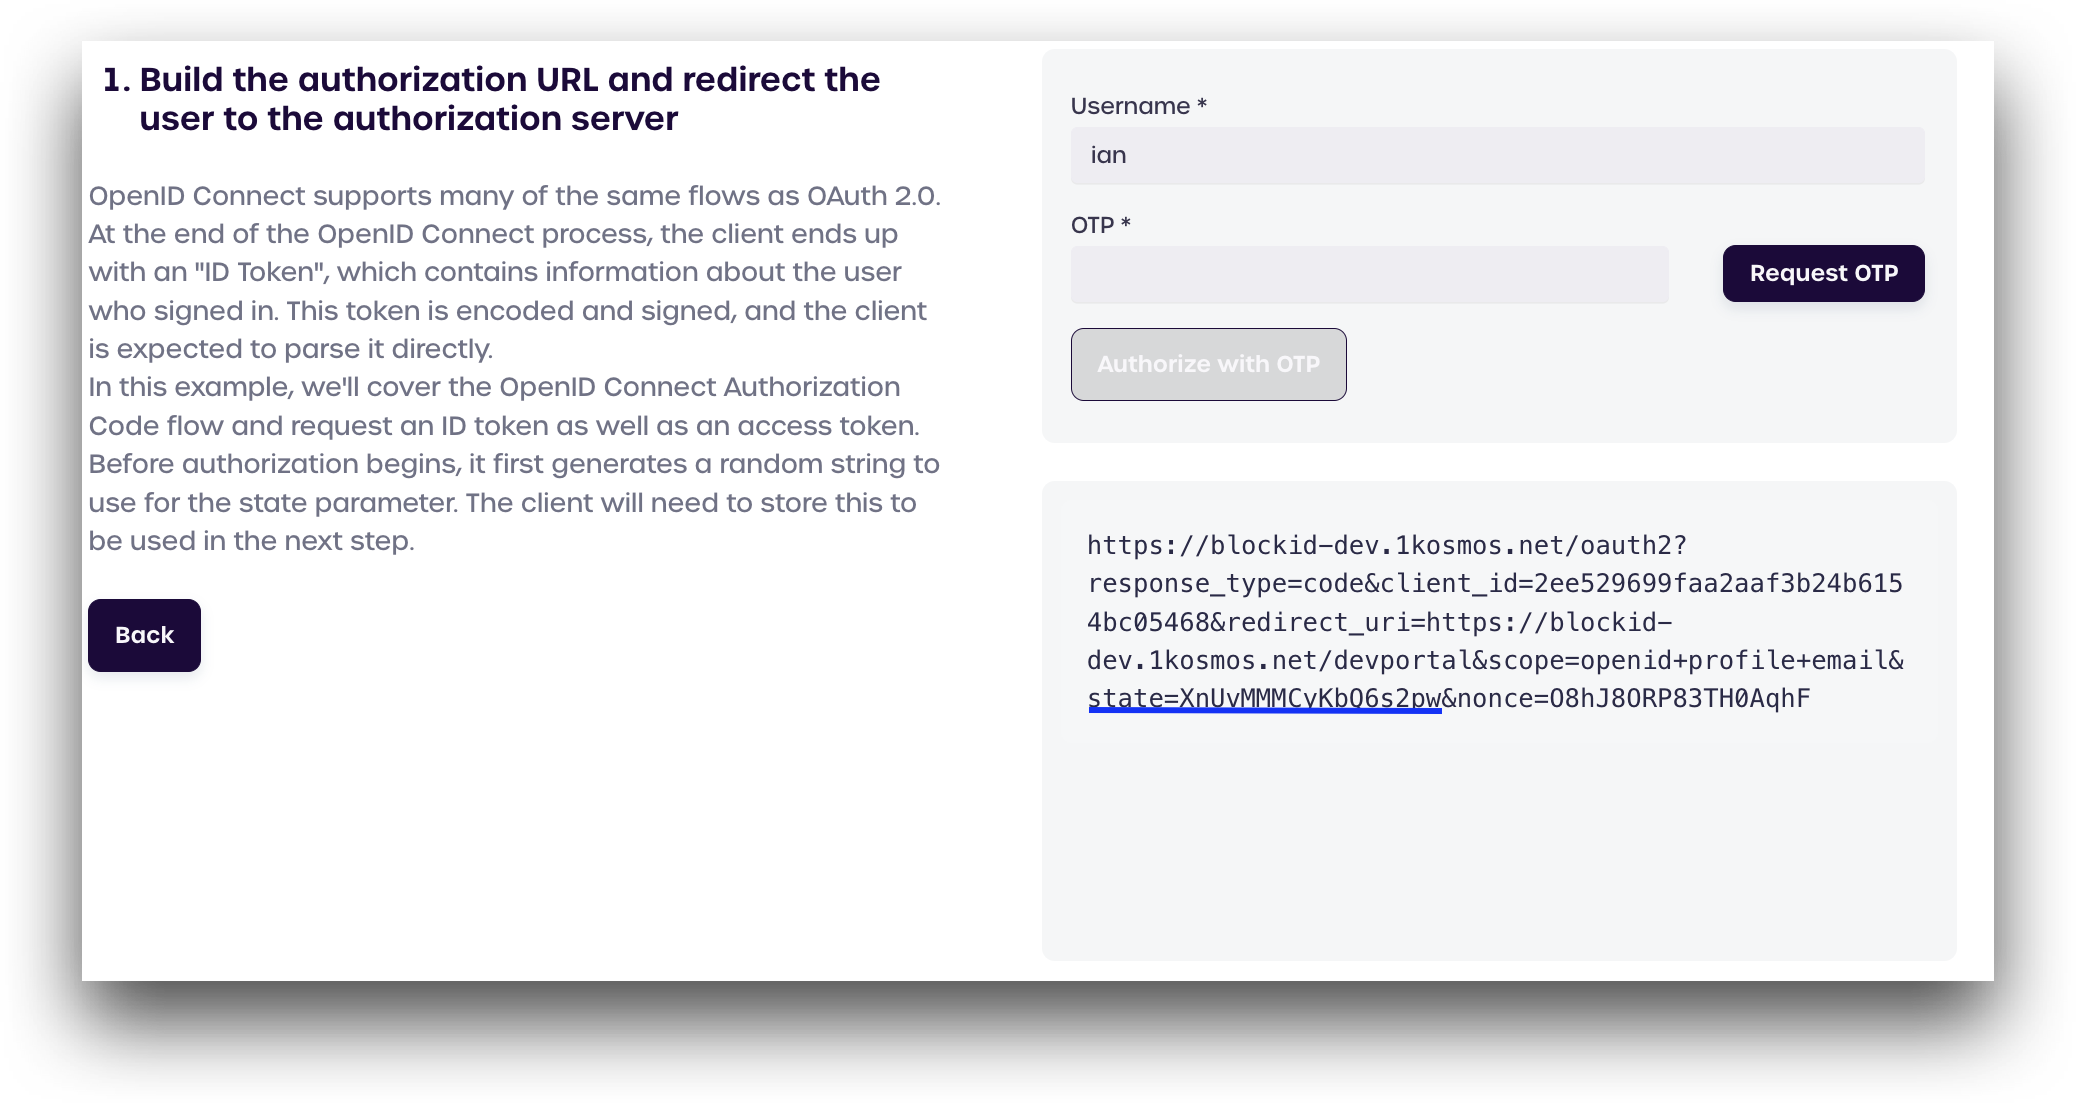
To start, click Request OTP to generate a six-digit One-Time Passcode (OTP).
Click Authorize with OTP.
Verify the State Parameter
We next need to verify that our state parameter has the same string that was shown earlier. If we examine our URL in the box on the bottom-right we can see that our state is still XnUvMMMCyKbQ6s2pw, which is what we want.
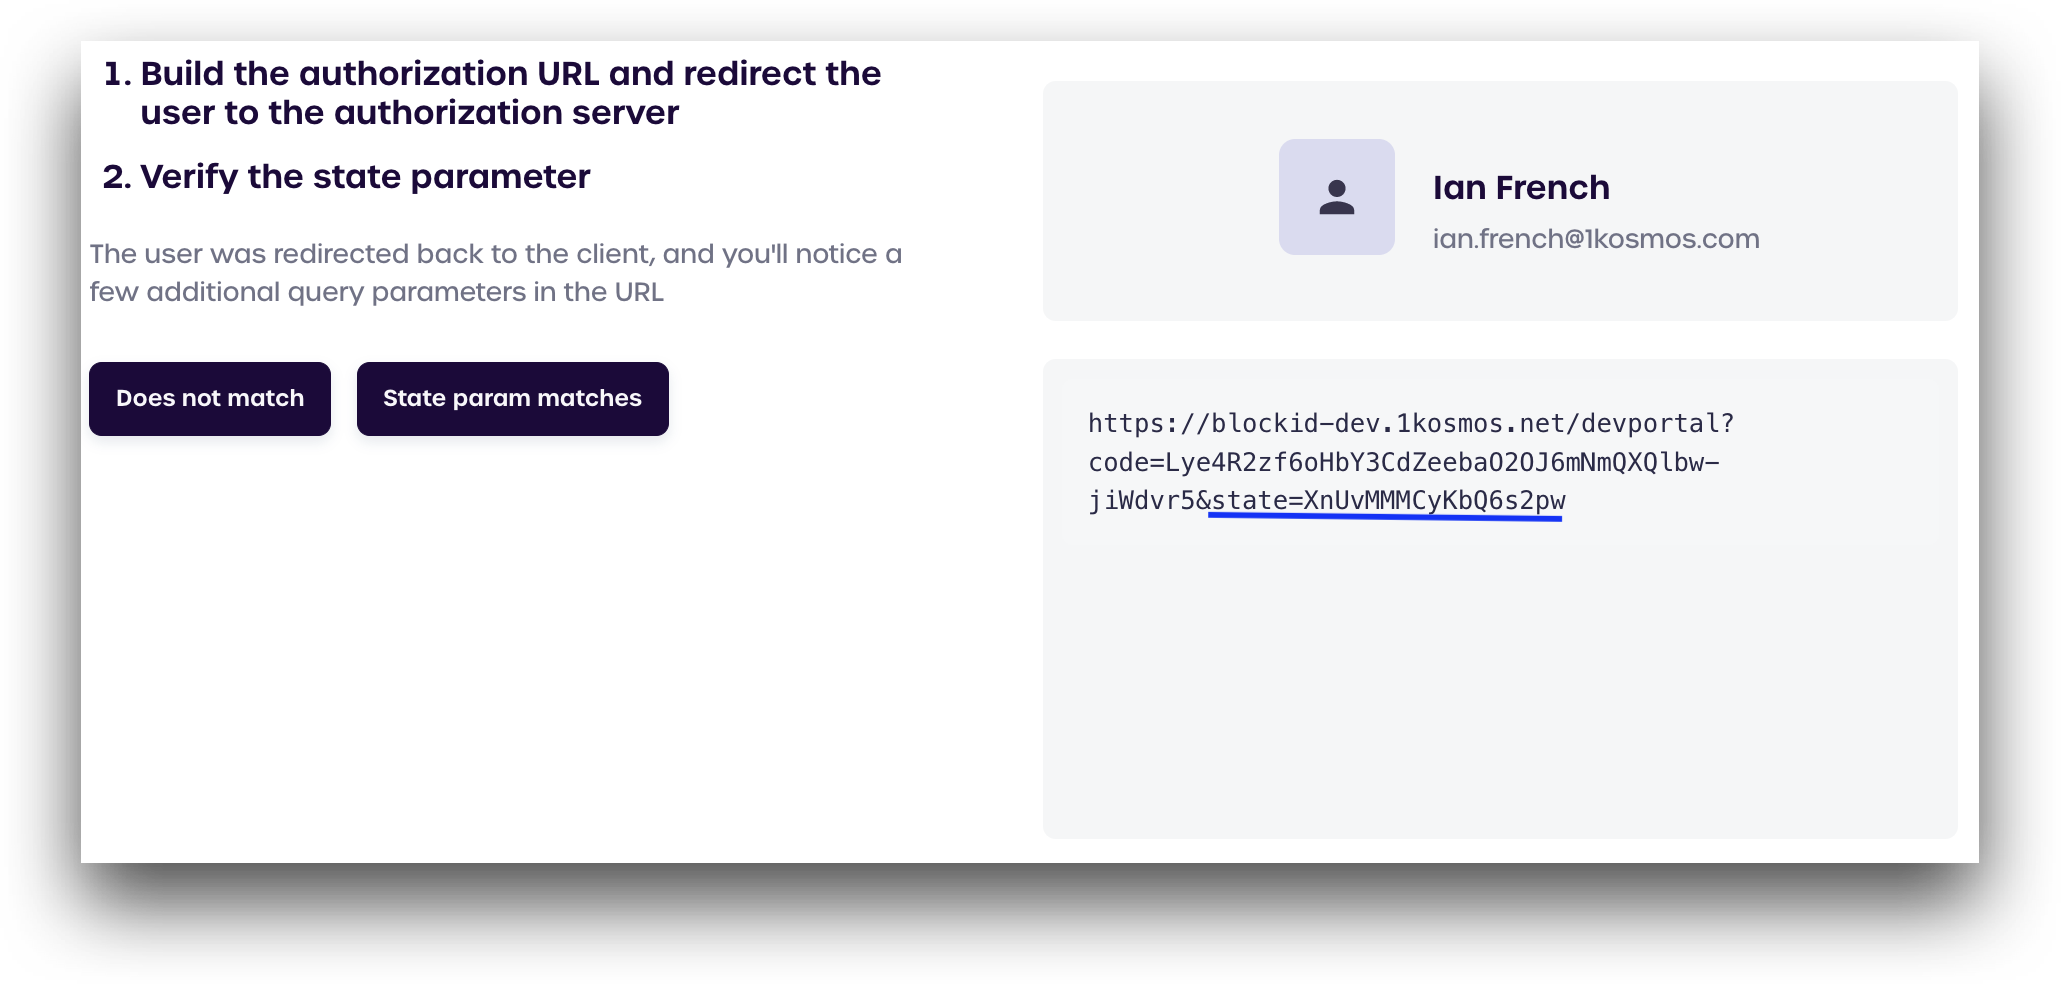
After verifying your state parameter matches, click State param matches.
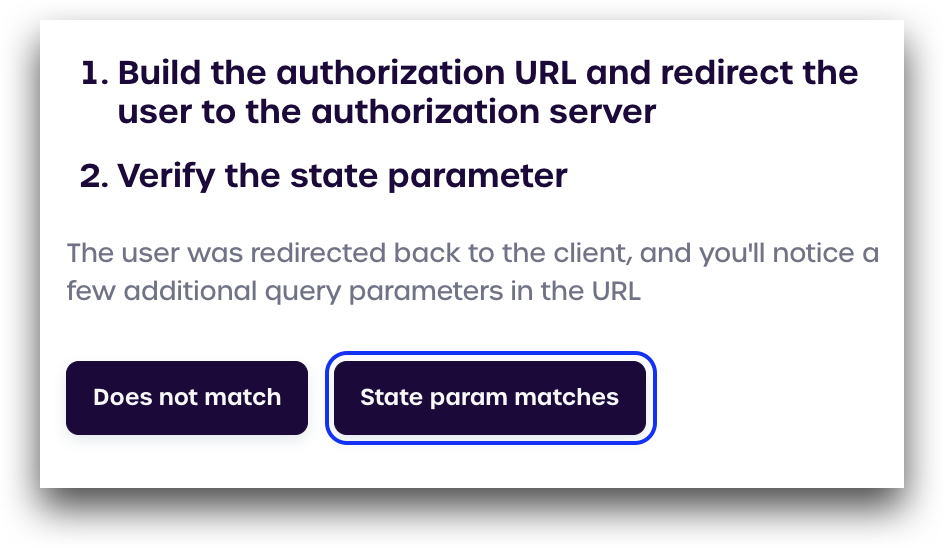
If your state parameter has changed, click Does not match to return to the previous page and generate a new state
Exchange the Authorization Code
After verifying the state, the URL will update to a POST request containing the OAuth client ID, client secret, and code, which can be seen in the box on the bottom right.
Click Next
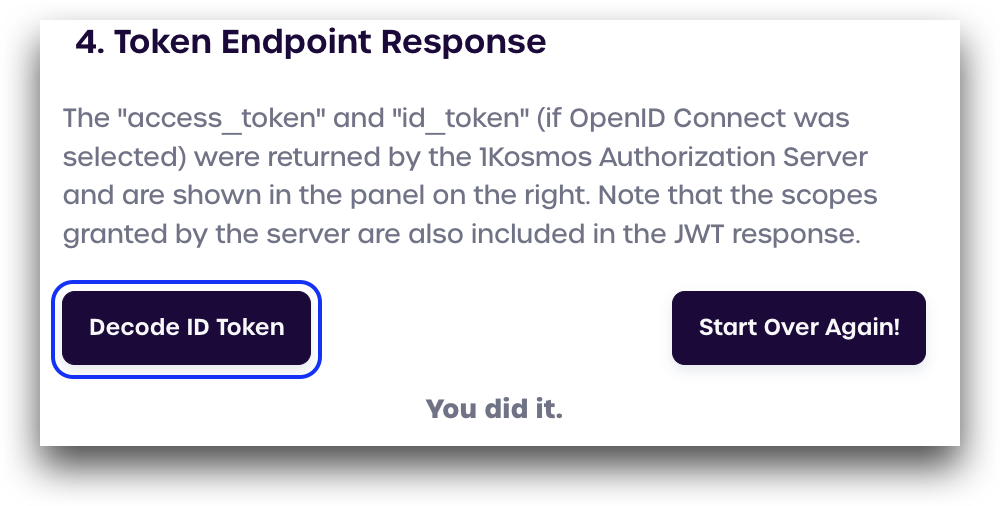
Token Endpoint Response
On this screen, we can see the server returned a JSON object containing the access_token and the encoded OIDC id_token, completing the OAuth2 authorization with OpenID Connect (OIDC) flow.
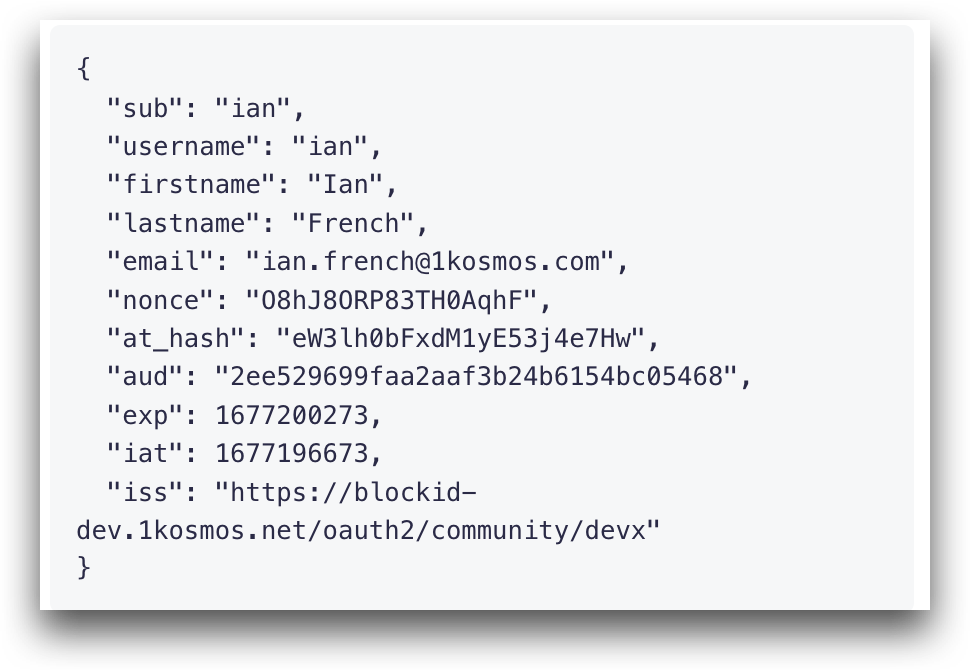
To decode the OIDC id_token and view information about the user who signed in, click Decocde ID Token. The user details will display below.