1Kosmos DevX SDK Documentation
The BlockID Developer SDK allows you to easily integrate BlockID services into your development platform. We currently support NodeJS, PHP, Java, and .NET.
Getting Started
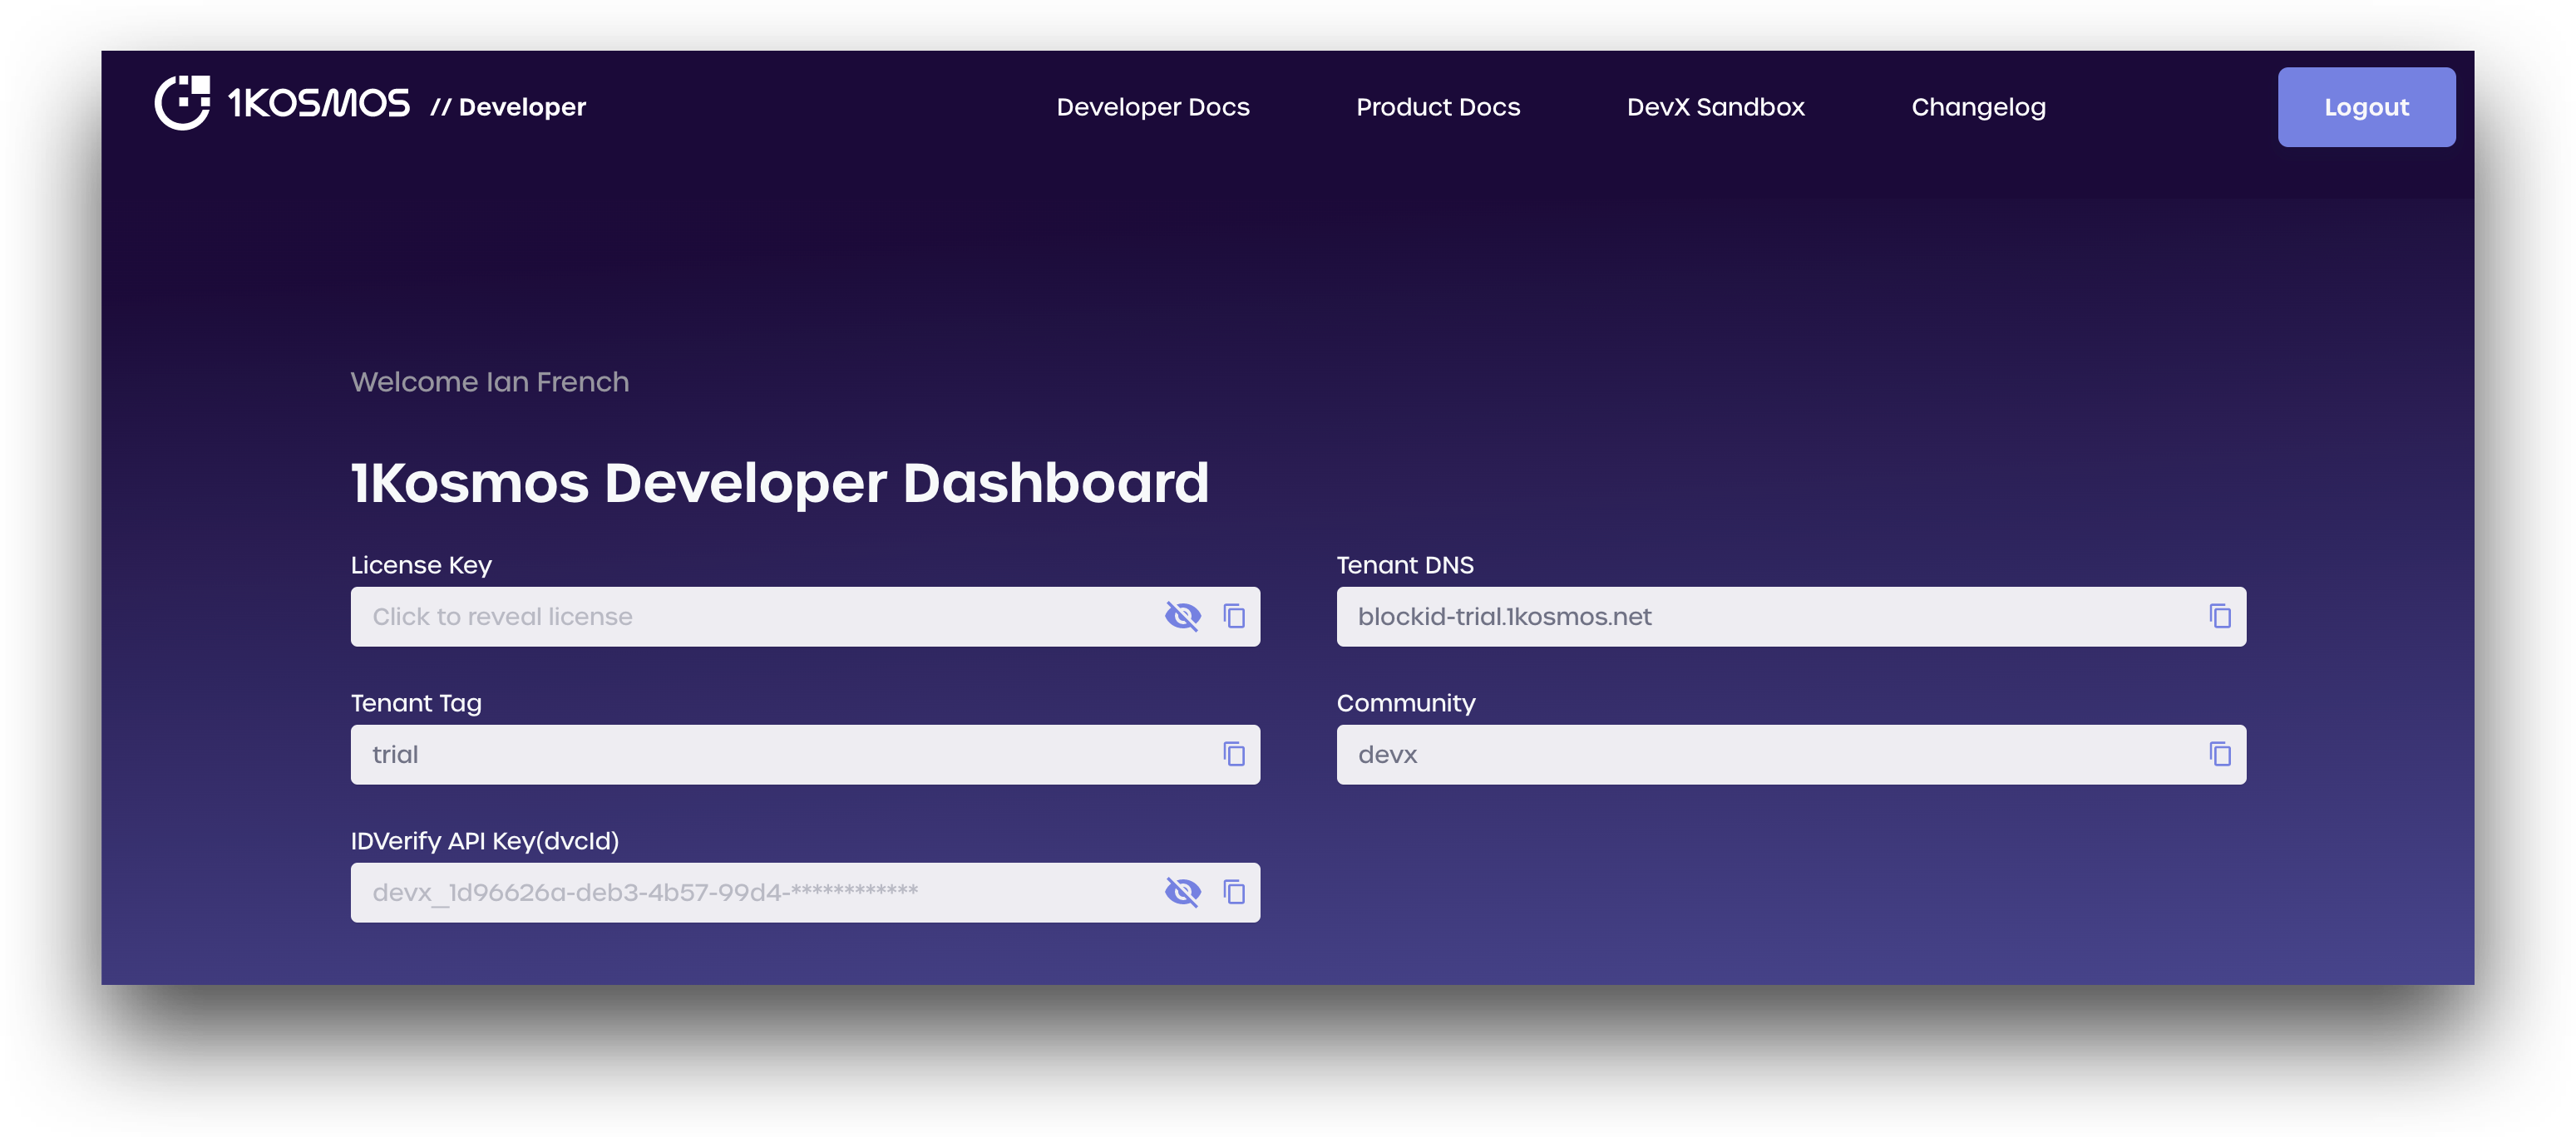
In order to configure and use the SDK, you will need the following information from your BlockID Developer Dashboard:
- Your Email Address
- Your License Key
- Tenant DNS
- Community Name
- IDVerify API Key(dvcId)
Install the BlockID SDK
To get started, install the BlockID SDK for your preferred development environment. The BlockID SDK contains all the necessary libraries and functions needed for secure communication between the BlockID API and user machines.
- NodeJS
- PHP
- Java
- .NET
Install the BlockID SDK for NodeJS
The NodeJS Helper SDK is designed to work with your server side environment
In your project directory, create or edit your package.json file to include the SDK as a dependency:
{
  "name": "project",
  "version": "0.0.0",
  "private": true,
  "dependencies": {
	 "blockid-nodejs-helpers": "git+https://github.com/1Kosmos/nodejs-helper-files#v2.0.05"
  },
 "description": "My project"
}
Next open a terminal, navigate to your project directory, and execute the following command to install the NodeJS SDK :
npm install
After installation, the BlockID SDK can be found in the <project root>/node_modules/blockid-nodejs-helpers folder
If you would prefer to install the NodeJS and its dependencies yourself, the git repo can be found at https://github.com/1Kosmos/nodejs-helper-files
Install the BlockID SDK for PHP
Clone the PHP SDK repo from our github and copy the files to your project directory
git clone https://github.com/1Kosmos/php-helper-files.git
The PHP SDK requires PHP 5.3.2+ to run.
Install the BlockID SDK for Java
We recommend using either Oracle Java SE version 8, or OpenJDK version 17.02 LTS as several security vulnerabilities have been linked to older Java versions
Clone the latest version of the Java SDK repo from our github and copy the files to your project directory.
git clone https://github.com/1Kosmos/java-helper-files.git
Adding the Java SDK to your Project
- Add repo to your project (as submodule) under path:
main › java › com › bidsdk(ability to add as gradle dependency will be added soon) - add to your
build.gradle:
ext {
	web3jVersion = "4.5.4"
}

dependencies {

	implementation group: 'org.bitcoinj', name: 'bitcoinj-core', version: '0.15.10'
	implementation "org.web3j:core:$web3jVersion"

	implementation group: 'com.squareup.okhttp3', name: 'okhttp', version: '4.3.1'
	implementation 'org.apache.httpcomponents:httpclient:4.5.13'
	implementation 'com.google.code.gson:gson:2.8.6'
}
Install the BlockID SDK for .NET FRAMEWORK
Prerequisites
- Visual Studio 2017 or higher
- .NET Framework 4.6.1 or higher
Clone the latest version of the .NET SDK repo from our github and performs the below steps.
-
Clone the main repository git clone https://github.com/1Kosmos/dotnet-helper-files.git. Clone of main repository will not pull the submodules. You need to execute step
2and3as well.git clone https://github.com/1Kosmos/dotnet-helper-files.git -
To initialize a Git submodule, use the “git submodule update” command with the “–init” and the “–recursive” options. This command will register the git submodule directory path for 'shared' folder.
git submodule update --init --recursive -
In order to update an existing Git submodule, you need to execute the “git submodule update” with the “–remote” and the “–merge” option.
git submodule update --remote --merge
- Navigate to the
dotnet-helper-filesfolder and open the project solution in Visual Studio (double-clickBIDHelpers.sln). - Build the solution: Select the project -> right-click -> Build.
After a successful build, BIDHelpers.dll will be generated in BIDHelpers/bin/Debug.
Add BIDHelpers.dll Reference to your Project
In your project directory, copy and paste BIDHelpers.dll file into your desired location.
- Add the reference in Visual Studio. Go to solution explorer and perform the following steps:
- Right click on References -> Add Reference -> Browse -> select
BIDHelpers.dll.
- Right click on References -> Add Reference -> Browse -> select
You are done, the references should now be visible in the References section of the solution explorer. That's it.
Install the BlockID SDK for .NET CORE
Prerequisites
- Visual Studio 2017 or higher
- .NET Core 3.1 or higher
Clone the latest version of the .NET CORE SDK repo from our github and performs the below steps.
-
Clone the main repository git clone https://github.com/1Kosmos/dotnetcore-helper-files.git. Clone of main repository will not pull the submodules. You need to execute step
2and3as well.git clone https://github.com/1Kosmos/dotnetcore-helper-files.git -
To initialize a Git submodule, use the “git submodule update” command with the “–init” and the “–recursive” options. This command will register the git submodule directory path for 'shared' folder.
git submodule update --init --recursive -
In order to update an existing Git submodule, you need to execute the “git submodule update” with the “–remote” and the “–merge” option.
git submodule update --remote --merge
- Navigate to the
dotnetcore-helper-filesfolder and open the project solution in Visual Studio (double-clickBIDHelpers.sln). - Build the solution: Select the project -> right-click -> Build.
After a successful build, BIDHelpers.1.0.0.nupkg will be generated in BIDHelpers/bin/Debug.
Install BIDHelpers nuget package into your Project
In your project directory, copy and paste BIDHelpers.1.0.0.nupkg file into your desired location.
- Add path for above nuget package into your project, Go to solution explorer and perform the following steps:
- Right click on Project -> Manage Nuget Packages -> Click on the Settings icon (Beside of the Package Source dropdown).
- Options window will open, click on Add Package (Plus Icon in green) -> and Add appropriate Name and Source (Path to the
BIDHelpers.1.0.0.nupkgabove into your project) -> After adding Name and Source, Click on OK button. - After adding this, select the newly added Package Name under the Package Source dropdown, you will see the BIDHelper package.
You are done, now you should be able to see BIDHelper nuget package ready to install into your project. That's it Thankyou.